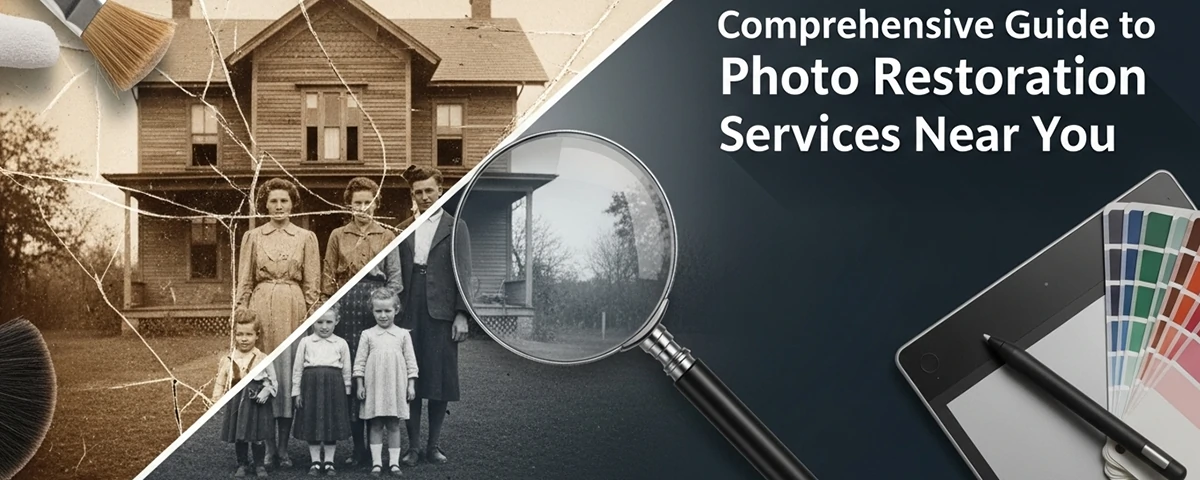

Learn professional techniques for restoring damaged old photographs, from scanning and digital cleanup to repairing tears, removing stains, correcting faded colors, and reconstructing missing areas using Photoshop and specialized restoration tools to preserve precious family memories for future generations.
?? Welcome to Image Restoration: Old photographs carry irreplaceable memories of family history, people, places, and moments that can never be recreated, but time takes its toll on physical prints through fading, tearing, staining, mold, scratches, and chemical deterioration that can obscure or destroy the images we treasure. Digital image restoration combines technical skill with artistic sensitivity to repair damage, restore original appearance, and preserve these precious photographs for future generations. This comprehensive guide covers every aspect of photo restoration from initial scanning and assessment through advanced repair techniques, color correction, and final output, providing both beginners and experienced editors with the knowledge and workflows needed to bring damaged photographs back to life with professional-quality results that honor the original images and the memories they contain.
?? Assessing Photograph Damage and Planning Restoration
The first step in any photo restoration project is a thorough assessment of the photograph condition, identifying all types of damage present, evaluating the severity of each issue, and planning the restoration approach before beginning any digital work, ensuring that you have the right tools, techniques, and reference materials needed to achieve the best possible result for each unique photograph. The common types of photograph damage include physical tears and missing pieces where the print has been ripped or sections are completely lost, creases and folds from improper storage that create lines across the image where the paper emulsion has been physically damaged and the image disrupted, stains from liquids, mold, mildew, or chemical reactions that discolor areas of the photograph, fading and color shifts from prolonged light exposure that wash out the original image tones, scratches and abrasions on the emulsion surface that appear as light or dark lines on the final image. The damage severity assessment involves examining the photograph under good lighting with magnification if necessary to distinguish between surface-level damage that affects only the print surface and deep damage that has affected the emulsion and image layer, evaluating whether missing image areas can be reconstructed from surrounding context or reference photos, and determining whether professional conservation or digital restoration is the appropriate approach for the specific photograph and its historical or sentimental value. The restoration planning includes gathering reference materials such as other photographs from the same era or of the same subjects that can guide color correction and detail reconstruction, taking notes on the types of damage present and the order in which they should be addressed, setting realistic expectations for what can be achieved with the available tools and skills, and deciding whether to work on a copy of the digital file or the original scanned image to preserve the original scan for reference and comparison throughout the restoration process. The documentation of the original photograph condition should include photographs of the original print before any work begins, notes on the photograph size, date if known, subjects, and any information about the original colors or appearance that can guide the restoration decisions, creating a record of the restoration process that preserves the history of the photograph and the work done to restore it for future reference and appreciation. The ethical considerations in photo restoration include respecting the original photograph character and not over-restoring to the point where the image loses its authentic vintage character, being transparent about reconstruction work when sharing restored photos with family members, and recognizing that some damage may be best left visible rather than attempting reconstruction that would be speculative and potentially misleading about what the original photograph actually showed.
?? Scanning Techniques for Optimal Digital Capture
Proper scanning is the foundation of successful photo restoration, because the digital file you create during scanning determines the quality ceiling for all subsequent restoration work, with a good scan capturing maximum detail, color information, and tonal range from the original print while a poor scan loses information that can never be recovered through any amount of digital restoration technique. The scanner selection for photo restoration should prioritize a flatbed scanner with optical resolution of at least 2400 DPI for prints up to eight by ten inches and 4800 DPI for smaller prints, with a transparency unit that enables scanning film negatives and slides, and good dynamic range that captures detail in both the darkest shadows and brightest highlights of the photograph being digitized for restoration. The scanning resolution guidelines recommend scanning at 600 DPI for standard prints that will primarily be viewed on screens or printed at similar size, 1200 DPI for prints that will be enlarged or require significant detail for restoration, and 2400 DPI or higher for small prints like wallet-sized photos where maximum detail capture is essential for restoration work that requires examining and reconstructing fine details at the pixel level. The scanning setup best practices include cleaning the scanner glass thoroughly before scanning, handling the original photograph with clean cotton gloves to avoid transferring oils or dirt to the print, placing the photograph face down on the scanner glass without pressing or bending damaged prints, using a weighted cover or book to ensure the photograph lies flat against the scanner glass for even focus across the entire image, and scanning in a dust-free environment to minimize dust spots that will need removal during the restoration process. The scanning file format and color settings should use TIFF format for maximum quality as the archival master file, scanning in 48-bit color depth to capture the maximum color information even for black and white photographs where the additional bit depth provides smoother tonal gradations for better restoration results, with JPEG format being reserved for web sharing and working copies while the original TIFF scan is preserved as the archival master that serves as the source for all restoration work. The multiple exposure scanning technique for photographs with extreme contrast range involves scanning the same photograph at different exposure settings to capture detail in both shadows and highlights, then combining the scans through HDR techniques or layer blending in Photoshop to create a single file with full tonal detail that better represents the original photograph appearance and provides more information for restoration work on damaged or faded areas of the print requiring detail recovery.
?? Repairing Tears and Reconstructing Missing Areas
Tears and missing areas are among the most common and visible types of photograph damage, requiring careful reconstruction using Photoshop healing tools, cloning techniques, and content-aware features that can repair torn areas, fill gaps where pieces are missing, and reconstruct image detail that has been lost to physical damage of the original photographic print. The repair of simple tears where the paper is split but no material is missing uses the spot healing brush tool set to content-aware mode, painting along the tear line to blend the two sides together while Photoshop analyzes the surrounding texture, lighting, and detail to create a seamless repair that makes the tear invisible in the final restored image, with careful strokes following the natural line of the tear and image details being used to guide the healing process. The clone stamp technique for more visible tears involves sampling nearby image areas with similar texture and tone, then painting over the tear with the sampled content, using a soft brush with low opacity for gradual blending, frequently resampling to avoid repeating patterns that reveal the repair work, and adjusting the sample source as the tear passes through different image areas like skin, background, or clothing that each require different source material for natural-looking repair. The content-aware fill for larger missing areas selects the damaged region with the lasso tool, then uses Edit and Content-Aware Fill to have Photoshop analyze the surrounding image and generate replacement content that matches the adjacent textures, lighting, and patterns, with the content-aware fill workspace providing controls for sampling area, fill color adaptation, and output settings that allow fine-tuning the generated fill for the best reconstruction of the missing photograph area. The reconstruction of faces and important details in missing areas is the most challenging restoration task, requiring reference to other photographs of the same person, careful study of the remaining facial structure on the damaged photo, and sometimes manually painting features using the brush tool with sampled colors and textures from the intact facial areas, with reconstruction being an artistic process that aims to recreate the likely appearance rather than reconstruct the exact original image. The hand-painted restoration using a graphics tablet for missing areas that cannot be filled automatically involves creating new image content by sampling colors, textures, and patterns from reference areas and painting them into the damaged region, using multiple layers with the surrounding image content visible as reference, and gradually building up the reconstructed area through many small brush strokes that blend with the surrounding original photograph detail for a seamless final restoration result that appears natural and consistent with the surviving image areas.
?? Removing Stains, Mold Spots, and Discoloration
Stains, mold spots, and discoloration from environmental exposure, chemical reactions, or biological growth create some of the most challenging restoration problems because they often cover large areas and penetrate through multiple layers of the photograph, requiring a combination of color correction, spot removal, and texture reconstruction techniques to restore the original image appearance beneath the damage. The spot healing brush is the primary tool for removing small to medium stains and mold spots, with the content-aware mode automatically sampling surrounding clean areas to replace the stained pixels, working best on stains that are clearly defined against relatively uniform background areas like sky, walls, or smooth surfaces where the surrounding content provides good source material for the healing process. The clone stamp technique for larger stain areas involves manually selecting clean source areas with similar tone and texture to the stained area being repaired, then carefully painting over the stain with multiple passes at reduced opacity to gradually blend the repair and avoid creating visible edges or repeating patterns that would reveal the restoration work upon close examination of the restored photograph. The color replacement technique for stains that have discolored rather than destroyed the photograph emulsion involves using the hue and saturation adjustment layer to target the specific color of the stain and desaturate or shift it to match the surrounding area, combined with careful masking to limit the adjustment to only the stained area, preserving the original image detail beneath the stain that remains intact but was previously hidden by the discoloration that masked it. The advanced stain removal using channels involves examining the red, green, and blue channels individually in the Channels panel to identify which channel contains the least stain visibility and using that channel as the basis for reconstruction, sometimes replacing the stained channel content with a modified version of a cleaner channel to eliminate stain appearance that is more visible in one color channel than others due to the chemical composition of the stain and its interaction with different color layers of the photographic emulsion. The mold damage treatment requires particular care because mold can continue to damage the photograph if not properly treated before scanning, with the recommended approach being to have severely mold-damaged photographs professionally cleaned by a conservator before scanning, while minor mold spots can be addressed in the digital restoration using the same spot healing and clone stamp techniques used for other stains, with the additional step of examining the photograph under different lighting conditions to ensure all mold spots are identified and treated in the restoration process.
?? Correcting Faded Colors and Restoring Original Tones
Color fading and tonal shifts are universal problems in old photographs, caused by decades of light exposure, chemical instability of early color printing processes, and the natural degradation of photographic dyes, requiring careful color correction techniques that restore the original vibrant tones while respecting the authentic character and color palette of the photographic era when the original print was created. The levels and curves adjustments in Photoshop are the primary tools for restoring tonal range to faded photographs, with the levels histogram typically showing a narrow range of tones in the middle with no pure blacks or pure whites, and the correction involving moving the black and white input sliders to the points where the histogram data begins, stretching the tonal range to restore full contrast from pure black through rich midtones to bright highlights that give the restored photograph depth and dimension. The auto color correction feature in Photoshop can provide a useful starting point for faded photographs, analyzing the image and applying adjustments to neutralize color casts and restore balanced color, though the auto result often needs manual refinement because old photographs may have intentional color casts from the original printing process or film stock that should be preserved as part of the photograph authentic character and vintage appearance. The selective color adjustment using the Hue and Saturation adjustment layers with targeted color ranges allows correcting specific colors that have faded or shifted more than others, such as restoring faded skin tones that have taken on a magenta or yellow cast, reviving faded blue skies that have shifted toward cyan, or correcting foliage that has turned brown from dye fading that affected green emulsion layers more than other colors in the photograph. The color reference approach uses other photographs from the same era, knowledge of historical color film characteristics, and information about the subjects like known clothing colors or familiar locations to guide color correction decisions, with the goal being to achieve colors that look natural and appropriate for the time period rather than making the photograph look like it was taken with modern digital color accuracy that would look anachronistic and inauthentic for the vintage photograph. The split toning and color grading techniques can add appropriate period character to restored black and white photographs that were originally printed with warm or cool tones, using the split toning controls to add subtle sepia warmth to highlights and shadows for a classic vintage look, cool blue tones for a cyanotype feel, or neutral gray tones for a pure black and white restoration that presents the photograph in its most historically accurate form based on the original print toning and the photographic processes commonly used when the original image was created.
?? Removing Scratches, Dust, and Surface Imperfections
Scratches, dust spots, and surface abrasions are among the most numerous imperfections in old photographs, often covering the image with hundreds or thousands of small defects that collectively degrade image quality, requiring systematic removal workflows that efficiently clean up the photograph surface while preserving the underlying image detail that the scratches and dust spots have obscured. The dust and scratches filter in Photoshop provides automated detection and removal of small surface defects by analyzing the image for small contrasting spots and blurring them to match the surrounding area, with the filter having threshold and radius controls that allow adjusting the sensitivity of dust detection and the area of blur applied to each detected spot, though the filter should be used on a duplicate layer with a layer mask to limit its effect to only the damaged areas and prevent overall softening of the image. The spot healing brush with content-aware mode is the most effective tool for individual scratch removal, with the brush size being set slightly larger than the scratch width and a single click or short stroke along the scratch being sufficient for Photoshop to analyze the surrounding area and generate replacement pixels that seamlessly blend with the adjacent image content, making scratches disappear without leaving visible traces of the repair work. The healing brush tool differs from the spot healing brush by requiring the user to manually select a clean source area that Photoshop uses as the basis for the repair, which is useful for scratches in areas with distinctive texture like fabric, hair, or foliage where automatic content-aware sampling may produce results that do not match the surrounding texture pattern and reveal the restoration work upon close examination. The clone stamp with aligned sampling mode is ideal for long scratches that run across multiple different image areas like a scratch crossing from sky through a face into clothing, allowing the user to resample from each clean area along the scratch path to maintain matching texture, tone, and detail as the repair progresses across different image content zones that each require different source material for natural-looking repair. The batch scratch removal workflow for heavily damaged photographs involves creating a systematic scanning pattern across the image, zooming to one hundred percent view, working through the image in sections using the spot healing brush for small spots and the healing brush or clone stamp for larger scratches, taking breaks to maintain fresh eyes for spotting remaining defects, and using the dust and scratches filter on a masked layer as a final cleanup pass for any remaining small imperfections that were missed in the manual removal process.
?? Repairing Cracked and Peeling Emulsion Layers
Cracked and peeling emulsion is a severe form of photograph damage where the image-bearing emulsion layer has separated from the paper base, creating cracks, lifted areas, and sometimes completely missing emulsion sections that require careful digital reconstruction to restore the image appearance and fill in the areas where the emulsion has been lost entirely. The digital repair of emulsion cracks involves using the healing brush and clone stamp tools to fill in the dark or light crack lines that appear where the emulsion has separated, working along each crack line with careful source sampling from adjacent intact areas to maintain the natural flow of image detail across the repaired crack, with multiple passes at reduced opacity creating smooth blends that make the cracks disappear without visible repair marks. The larger areas of missing emulsion require reconstruction using content-aware fill for simpler areas like sky or background, while facial features, text, and distinctive patterns require manual reconstruction using sampled detail from the same or similar photographs, with the reconstruction being painted on separate layers using brushes with sampled colors and textures to gradually rebuild the missing image content. The texture matching for emulsion repair is critical because the surrounding original photograph has a natural grain structure and surface texture that must be replicated in the repaired areas to prevent the restoration from looking artificially smooth and flat compared to the original emulsion texture, with noise addition or texture overlay techniques being used to match the repaired areas to the original photograph grain and surface character. The composite restoration technique for photographs with severe emulsion loss where multiple copies of the same photograph exist involves scanning all available copies and combining the best-preserved sections from each into a single restored image, using the alignment tools in Photoshop to register the copies exactly, then masking to reveal the best area from each copy and blending the seams for a complete restoration that incorporates the best surviving elements from all available copies of the damaged original. The color matching between original and reconstructed emulsion areas requires careful sampling of the surrounding original colors and applying them to the reconstructed areas with appropriate variation that matches the natural color variation in the intact photograph, using the brush tool in color mode to apply sampled colors while preserving the underlying texture of the repair work and creating a seamless visual match between original and restored areas of the photograph emulsion.
?? Sharpening and Detail Recovery for Soft or Blurry Old Photos
Old photographs often appear soft, slightly blurry, or lacking in fine detail due to limitations of vintage cameras, lens quality, slight camera movement during long exposures, or the natural degradation of the image over decades of aging, with careful sharpening and detail enhancement techniques in Photoshop helping to recover as much detail as possible while avoiding the creation of artifacts that make the restored photograph look artificially processed. The unsharp mask filter in Photoshop is the primary tool for sharpening restored photographs, applying a controlled amount of sharpening that enhances edge contrast to make the image appear sharper and more detailed, with the amount, radius, and threshold settings being adjusted carefully based on the specific photograph content and the level of detail present in the original image, with typical settings starting at amount fifty to one hundred percent, radius one to two pixels, and threshold two to ten levels. The smart sharpen filter provides more sophisticated sharpening control than unsharp mask, with options for reducing lens blur, motion blur, and focus blur separately, and advanced controls for shadow and highlight sharpening that allow reducing sharpening artifacts in smooth areas like skin and sky while maintaining detail enhancement in textured areas that benefit from the sharpening treatment for improved image clarity. The high-pass sharpening technique involves duplicating the background layer, applying the high pass filter with a radius of one to three pixels, setting the layer blend mode to overlay or soft light, and adjusting the layer opacity to control the amount of sharpening, providing a non-destructive sharpening method that can be easily adjusted or masked to limit sharpening to specific areas of the photograph where detail enhancement is needed most. The selective sharpening approach uses layer masks to apply different levels of sharpening to different areas of the photograph, with higher sharpening applied to important detail areas like faces, eyes, and text, while smooth areas like sky, skin, and out-of-focus backgrounds receive minimal or no sharpening to avoid creating noise and artifacts that would degrade image quality in areas where sharpening is not beneficial for the appearance of the restored photograph. The AI-powered sharpening tools available in recent Photoshop versions and specialized restoration software can analyze photographs and apply intelligent sharpening that distinguishes between actual image detail and noise or grain, applying enhancement only to real image content while leaving the natural grain structure of the old photograph intact, providing superior results for severely soft images where traditional sharpening techniques would create unacceptable artifacts or amplify the visibility of the original photograph grain structure and surface texture.
?? Colorizing Black and White Photographs Digitally
Digital colorization of black and white photographs adds realistic color to monochrome images by researching historical color information and applying appropriate colors to different elements of the photograph using Photoshop techniques that create natural-looking color while preserving the original tonal values and detail of the black and white image that provides the foundation for the colorization work. The historical research for accurate colorization involves studying the subjects known clothing preferences, researching typical colors for uniforms and official dress of the period, examining other color photographs from the same era for color reference, consulting historical color charts and documentation, and looking for any notes or descriptions of colors written on the back of the photograph or in family records that can guide accurate color choices for the restoration. The colorization workflow in Photoshop begins with converting the image to RGB color mode, creating separate layers for each color area with the layer blend mode set to color, using the brush tool to paint color onto each layer with the appropriate hue and saturation for each element, working from background to foreground, and adjusting layer opacity to achieve natural-looking color intensity that enhances the photograph without appearing artificial or oversaturated. The skin tone colorization requires particular care because human skin has subtle color variations that are easily made to look artificial, with skin tones being built up from multiple color layers including a base skin tone layer, a warm tone layer for cheeks and sun-exposed areas, and a cool tone layer for shadow areas, with the multiply and overlay blend modes being used in addition to color mode to create natural skin color variation that follows the underlying black and white tonal structure. The colorization of backgrounds, sky, foliage, and architectural elements should be based on historical accuracy and typical colors for the location and season, with sky colors varying by time of day and weather conditions that may be suggested by the shadow direction and quality in the original black and white photograph, foliage colors following natural seasonal variation, and building colors being researched from historical records of the specific location when possible for historically accurate colorization. The final colorization refinement involves adding subtle color variations that prevent the image from looking like a flat color overlay, with slight color shifts across different areas of skin, clothing highlights and shadows receiving appropriate color temperature changes, atmospheric perspective being added to distant elements, and the overall color balance being adjusted to create a cohesive, natural-looking color image that honors the original black and white photograph while bringing it to life with appropriate historical color that makes the subjects and scenes feel more immediate and connected to the present day.
?? Adding Back Texture and Photographic Grain for Authenticity
Adding appropriate texture and photographic grain back into restored photographs is an essential final step that prevents the restored image from looking artificially smooth and digital, recreating the natural surface texture and grain structure of the original photographic print that gives vintage photographs their characteristic appearance and authentic feel that modern digital images lack without intentional texture treatment. The photograph grain structure is created by the silver halide crystals in black and white film or the dye clouds in color film that form the image, and this natural grain has a specific size, shape, and distribution that varies by film type, speed, and processing, with restoration adding grain back to areas that have been repaired, smoothed, or reconstructed to match the original photograph grain pattern and surface character. The noise addition technique uses the Photoshop Add Noise filter on a separate layer set to overlay or soft light blend mode, with the noise amount, distribution, and monochromatic settings being adjusted to match the original photograph grain size and intensity, and the layer opacity being tuned to achieve a grain appearance that matches the original photograph without overpowering the image detail or looking like artificial digital noise. The film grain overlay technique uses scanned samples of actual film grain from the same era or professionally created film grain texture libraries, applying these authentic grain textures to the restored photograph through layer blending and opacity adjustment that recreates the specific grain character of the original film stock and photographic paper combination that produced the original photograph being restored. The surface texture addition for photographs that were printed on textured paper recreates the paper surface pattern that interacted with the emulsion during printing, with textures like luster, matte, silk, or canvas finishes being applied as overlay layers with appropriate opacity and blending to match the original print surface that is often visible in the undamaged areas of the photograph as reference for the correct texture pattern and intensity. The selective texture application ensures that reconstructed areas receive the same texture treatment as the original undamaged areas, with different areas of the same photograph potentially requiring different texture approaches if the original print had variable surface characteristics due to damage, retouching, or the specific printing techniques used when the original photograph was created in the darkroom or commercial photo lab many decades ago.
?? Archival Output and Preservation of Restored Photographs
The final stage of photo restoration involves proper archival output and preservation of both the restored digital file and the original physical photograph, ensuring that the restoration work is preserved for future generations through appropriate file formats, storage media, backup strategies, and printing methods that protect the restored image from the same degradation that damaged the original photograph over its lifetime. The archival file format for restored photographs should be TIFF format at the maximum bit depth and resolution that the original scan and restoration work supports, preserving all the detail and color information without the compression losses that JPEG format introduces, with the TIFF file serving as the master archival copy from which all other output formats are derived for different uses including printing, web sharing, and family distribution. The file naming and metadata for archival storage should include the photograph original date if known, the subjects names, the location, the restoration date, the restorer name, and notes about the restoration work performed, embedded in the file metadata using IPTC fields in Photoshop, creating a permanent record attached to the digital file that preserves the photograph history and restoration documentation for future generations who may need to understand or continue the restoration work. The backup strategy for restored photographs should follow the three-two-one backup rule with at least three copies of each restored file, stored on at least two different types of media, with at least one copy stored offsite, combining local external hard drive storage for primary access, cloud backup service for offsite protection, and archival optical media like M-Disc for long-term storage that is not subject to the same failure risks as magnetic hard drives and solid-state storage that may degrade over decades of storage. The printing of restored photographs for display or archival storage should use archival quality photo paper with rated longevity of one hundred years or more, pigment-based inks that resist fading better than dye-based inks, and UV-protective glazing if framed, with the print being stored in archival-quality materials that are acid-free and lignin-free to prevent the chemical deterioration that damaged the original photograph over its lifetime before restoration. The sharing and distribution of restored photographs to family members should include both digital copies on easily accessible media like USB drives or cloud sharing and high-quality prints that can be displayed and enjoyed, with each family member receiving the same archival-quality file and print that preserves the restored image independently, ensuring that the restoration work benefits as many family members as possible and the image is preserved across multiple locations and owners for maximum long-term survival of the restored family photographic heritage.
?? Removing Silver Mirroring and Tarnish from Old Photographs
Silver mirroring is a distinctive form of photograph deterioration that affects many vintage black and white prints, appearing as a metallic, mirror-like sheen in the shadow areas of the photograph caused by the migration of silver particles within the emulsion toward the print surface over decades of aging, creating a reflective layer that obscures image detail and gives affected areas an unnatural, shiny appearance that must be addressed through specialized digital restoration techniques. The silver mirroring appears most prominently in the darkest areas of the photograph where the highest concentration of silver is present, with the mirroring effect being visible as a blue-gray, silver, or gold metallic sheen that changes appearance depending on the viewing angle and lighting conditions, making it particularly difficult to capture in a single scan because the reflective surface behaves differently at different scan angles and lighting positions. The scanning technique for silver mirroring involves experimenting with different scan angles and light sources to find the position that minimizes the mirroring reflection, sometimes scanning the photograph at a slight angle or using polarized light to reduce the reflective glare, and in some cases making multiple scans at different angles to capture detail from beneath the mirroring that can be combined in post-processing to reduce the mirroring appearance in the final restored image. The digital removal of silver mirroring in Photoshop uses the brush tool set to color mode with sampled shadow colors to paint over the reflective areas, replacing the metallic sheen with appropriate dark tones that match the surrounding shadow areas, combined with the clone stamp tool to restore any image detail that was hidden beneath the mirroring and needs to be reconstructed from adjacent visible detail in the same tonal range. The channel-based technique for silver mirroring removal involves examining the red, green, and blue channels individually to identify which channel has the least mirroring visibility, then using that channel as the primary source for reconstruction by copying it into the affected areas through layer masking, with the goal being to replace the mirroring-affected pixels with image information from the cleanest channel that preserves the original detail beneath the reflective surface. The advanced mirroring reduction using frequency separation separates the image into color and texture layers, allowing the mirroring color cast to be addressed on the color layer while preserving the underlying detail on the texture layer, with careful brush work on the color layer replacing the metallic sheen with appropriate shadow colors while the texture layer maintains the original photograph grain and detail that gives the restored shadow areas their natural appearance and consistency with the surrounding undamaged photograph areas.
?? Restoring Photographs with Ink Marks, Writing, and Stamps
Old photographs frequently have ink marks, handwritten notes, date stamps, or rubber stamp impressions added by previous owners, archives, or photo processing labs, with these marks ranging from historically valuable annotations that should be preserved to distracting additions that obscure important image content and require careful digital removal to restore the original photograph appearance beneath the markings. The assessment of marks and writing on photographs begins with determining whether the marks have historical value as part of the photograph provenance, with handwritten dates, names, locations, and personal messages often being important historical records that should be preserved alongside the restored image, while stamps from photo labs, dealers, or archives, and unrelated scribbles or marks that obscure image content are typically candidates for removal in the restoration process. The ink removal technique for ballpoint pen, fountain pen, and marker marks uses the spot healing brush with content-aware mode for small marks, with the healing brush for larger marks where manual source sampling provides better control over the replacement texture and color matching to ensure the repaired area blends naturally with the surrounding photograph surface and image content. The correction fluid and white-out stain removal requires a different approach because these opaque white substances completely cover the photograph surface and often have a different texture and reflectivity than the original print, requiring the clone stamp tool to rebuild the image detail beneath the correction fluid from surrounding visible detail, combined with careful color and texture matching to make the repaired area consistent with the adjacent original photograph surface. The date stamp ink removal from photo lab processing stamps that commonly appear on the back but sometimes bleed through or appear on the front of vintage photographs uses the clone stamp and healing brush tools to sample adjacent clean areas and paint over the stamp ink, with the challenge being that stamp ink often has a chemical composition that has interacted with the photograph emulsion, creating a stain that may require color correction in addition to surface texture repair for complete removal. The preservation of historically valuable handwriting as a separate layer before removal from the photograph involves scanning the photograph with the handwriting visible, creating a duplicate layer where the handwriting is removed using restoration techniques, and then preserving the original scan as a historical record while the cleaned version serves as the restored image, with the handwriting being preserved as a separate digital artifact that documents the photograph history and provenance. The stamp and seal removal from official documents and identification photographs that have been stamped with institutional seals requires particularly careful restoration because the stamp ink often overlaps important facial features or document text that must be reconstructed, with the reconstruction using the clone stamp tool with carefully selected source areas from the same facial feature or document area to rebuild obscured detail, and the healing brush to blend the reconstructed areas with the surrounding original photograph content for seamless restoration results.
?? Restoring Underexposed and Overexposed Vintage Photographs
Many vintage photographs suffer from exposure problems that were present from the moment the original picture was taken, with underexposed images appearing too dark with lost shadow detail and overexposed images appearing too bright with washed-out highlights, requiring specialized digital correction techniques that go beyond standard levels and curves adjustments to recover detail from exposure extremes that were inherent in the original capture. The underexposed photograph correction begins with the levels and curves adjustments to brighten the overall image, but because underexposed areas contain very little original detail information, simply brightening them often reveals significant digital noise and color artifacts that were hidden in the darkness, requiring noise reduction techniques and careful balancing between detail recovery and image quality preservation for acceptable restoration results. The exposure blending technique for severely underexposed photographs involves creating multiple adjustment layers at different exposure levels, using layer masks to reveal the best exposed version of each image area, combining properly exposed midtones from a moderate adjustment with highlight detail from a darker version and whatever shadow information can be recovered from the brightest version, creating a composite image with more complete tonal information than any single adjustment could achieve from the underexposed original. The overexposed photograph recovery is often more challenging than underexposed recovery because overexposed areas may contain no original image information at all, with the film being completely saturated by too much light and recording pure white with no detail, requiring reconstruction of lost highlight detail using the clone stamp and healing brush tools to rebuild texture and detail in washed-out areas from adjacent surviving detail or from reference photographs of the same subject. The highlight reconstruction for overexposed portrait photographs involving blown-out skin areas, washed-out clothing, or featureless sky areas uses the surrounding visible detail as source material, with the clone stamp sampling adjacent skin tones to rebuild facial features, the healing brush blending the reconstructed areas for natural appearance, and careful attention to maintaining the correct anatomical proportions and lighting direction when reconstructing overexposed facial features from the surviving shadow-side detail of the face in the same photograph. The camera raw processing techniques adapted for vintage photograph exposure correction involve using the Adobe Camera Raw filter in Photoshop even for scanned photographs, leveraging the highlight recovery, shadow recovery, clarity, dehaze, and texture sliders that were designed for digital camera raw files but work effectively on scanned TIFF files to recover detail and improve tonal range in both underexposed and overexposed vintage photographs that suffer from original capture exposure errors limiting their image quality and detail visibility in the original print.
?? Restoring Daguerreotypes, Tintypes, and Early Photographic Processes
Daguerreotypes, tintypes, and ambrotypes are early photographic processes from the nineteenth century that require specialized restoration approaches because their physical construction is fundamentally different from later paper-based photographs, with images created on silver-plated copper, iron, or glass respectively, presenting unique challenges for both physical handling and digital restoration that differ from conventional print restoration techniques. The daguerreotype restoration is particularly challenging because the image is formed by microscopic silver particles on a polished silver surface, creating a unique reflective quality where the image appears positive or negative depending on the viewing angle, requiring careful scanning techniques using diffused lighting at specific angles to capture the image without the strong reflections and mirror-like surface characteristics that make standard flatbed scanning ineffective for capturing the full tonal range and detail of the daguerreotype image. The tintype photography also known as ferrotype uses a thin iron sheet coated with a dark lacquer and light-sensitive emulsion, with the image having a distinctive metallic quality and often appearing dark and low in contrast, requiring scanning with careful exposure management to capture the subtle tonal variations that are characteristic of the tintype process and distinguish it from other nineteenth-century photographic formats in restoration and preservation work. The ambrotype created on glass with the image appearing as a positive when backed with dark material requires backlighting or careful background selection during scanning to capture the complete tonal range of the image, with the glass plate nature of the ambrotype making it particularly susceptible to scratches, emulsion flaking, and breakage that require both careful physical handling and specialized digital reconstruction techniques for complete restoration. The digital reconstruction of damaged early photographic processes involves many of the same healing and cloning techniques used for paper photographs but adapted for the unique tonal characteristics of each process, with daguerreotypes requiring careful attention to the distinctive warm tone and reflective quality, tintypes requiring contrast adjustment to reveal the subtle tonal range characteristic of the medium, and ambrotypes requiring careful handling of the glass reflections and the image reversal that is characteristic of the ambrotype viewing experience. The historical documentation and preservation of early photographic processes should include detailed notes about the specific process type identified through examination of the physical characteristics, the estimated date range based on the process type and any available documentation, and the condition assessment that informs both the restoration approach and the historical value of the image as an example of early photographic technology that represents an important chapter in the history of photography and visual documentation of the nineteenth century.
?? Building a Photo Restoration Workspace and Tool Kit
Setting up a dedicated workspace for photo restoration with the right equipment, software, and organizational tools significantly improves both the quality and efficiency of your restoration work, providing the controlled environment and professional tools needed to handle, scan, and digitally restore old photographs with the attention and care they deserve as irreplaceable historical documents and family treasures. The scanning equipment foundation includes a high-quality flatbed scanner with at least 2400 DPI optical resolution, 48-bit color depth capability, and a transparency unit for scanning film negatives and slides, with Epson Perfection series and Canon CanoScan models being popular choices among restoration professionals for their consistent quality, reliable performance, and software features that support the precise scanning requirements of photo restoration work. The monitor and display setup for photo restoration requires a color-calibrated monitor with good color accuracy and wide gamut coverage, using a hardware calibration tool like X-Rite i1Display Pro or Datacolor Spyder X to regularly calibrate the monitor to ensure the colors and tones you see while restoring accurately represent the actual image data, preventing wasted effort from corrections that only look correct on an uncalibrated display that does not accurately represent the true image appearance. The input devices for restoration work benefit from a graphics tablet like Wacom Intuos or Cintiq that provides pressure-sensitive stylus control for precise healing brush, clone stamp, and brush work that is essential for detailed restoration tasks, with the tablet offering much more natural control than a mouse for the fine, careful work required in photo restoration where pixel-level precision is often needed for natural-looking results. The software tool kit for photo restoration includes Adobe Photoshop as the primary application with its comprehensive healing, cloning, color correction, and layering capabilities, supplemented by specialized plugins like AKVIS Retoucher for automated restoration tasks, Topaz Photo AI for intelligent sharpening and noise reduction, and Nik Collection for color correction and tonal adjustment tools that provide additional capabilities beyond what Photoshop alone offers for the demanding requirements of professional photo restoration work. The organizational supplies for handling original photographs include clean cotton gloves for handling prints without transferring oils, archival-quality storage sleeves and boxes for organizing original photographs before and after scanning, soft brushes and compressed air for cleaning surface dust from photographs before scanning, magnifying loupes and LED light tables for examining photographs in detail during the damage assessment phase, and a detailed filing system for organizing digital files with consistent naming conventions and folder structures that make finding and managing restoration projects efficient and organized for ongoing restoration work across multiple photograph collections and projects.
?? Frequently Asked Questions About Photo Restoration
?? Can all old photographs be restored?
Most photographs can be improved through digital restoration, but the degree of restoration possible depends on the type and severity of damage, the quality of the original image, and the availability of reference material, with severely damaged faces and completely missing areas being the most challenging to reconstruct while basic damage like fading and small scratches can almost always be successfully repaired.
?? What is the best resolution for scanning old photos?
Scan at 600 to 1200 DPI for standard prints up to eight by ten inches, and 2400 DPI or higher for small prints, using TIFF format with 48-bit color depth to capture maximum detail and color information for restoration work, with higher resolution providing more pixel data for detailed repair work on damaged areas of the photograph.
?? How much does professional photo restoration cost?
Professional photo restoration costs range from fifty to one hundred fifty dollars for basic restoration including scratch removal and color correction, one hundred fifty to three hundred dollars for moderate damage repair including tear repair and stain removal, and three hundred to over one thousand dollars for extensive restoration involving facial reconstruction, major missing area repair, and detailed colorization work.
?? Is it better to restore the original print or a digital copy?
Always work on a digital copy scanned from the original photograph, never the original print itself unless you are trained in physical photo conservation, because digital restoration is completely reversible while physical restoration techniques can permanently alter or damage the original photograph that may have irreplaceable historical and sentimental value for your family.
?? What software is best for photo restoration?
Adobe Photoshop is the industry standard for photo restoration with the most comprehensive set of healing, cloning, color correction, and reconstruction tools, while specialized restoration software like AKVIS Retoucher, Topaz Photo AI, and Retouch Pilot offer focused tools for specific restoration tasks, with free alternatives like GIMP providing basic restoration capabilities for users without Photoshop access.
?? How do I restore a photograph that has water damage?
Scan the photograph carefully while still flat and dry if it is already dry, then use digital restoration techniques including the spot healing brush for water spots, clone stamp for stained areas, and levels and curves adjustments for overall tonal correction, with severe water damage causing emulsion sticking requiring professional physical conservation before digital scanning and restoration work can proceed effectively.
?? Can I restore a photograph that is torn in half?
Yes, torn photographs can be restored by scanning both pieces separately or together if they fit on the scanner, aligning them on separate layers in Photoshop with reduced opacity to match the torn edges, using the healing brush and clone stamp to repair the tear line, and reconstructing any missing image detail along the tear edge where small pieces of the emulsion may have been lost at the point of the tear.
?? Conclusion: Preserving History Through Photo Restoration
Photo restoration is a rewarding craft that combines technical skill, artistic sensitivity, and historical awareness to preserve precious family memories and historical images for future generations, transforming damaged, faded, and deteriorating photographs into restored treasures that can be shared, displayed, and enjoyed by family members who may never have seen the original images in their full beauty. The restoration process covered in this guide provides a complete workflow from initial damage assessment and scanning through every repair technique to final archival output, with each step building on the previous ones to systematically address every type of damage that can affect old photographs and restore them as completely as possible using the powerful digital tools available in Photoshop and other restoration software. The patient, methodical approach is essential for successful photo restoration, with each repair requiring careful attention to detail, respect for the original photograph character, and the willingness to spend hours on a single image to achieve a result that honors the original photograph and the memories it contains, making the time investment worthwhile when family members see the restored image and connect with the people and moments captured in the photograph. The learning journey in photo restoration is ongoing, with each photograph presenting unique challenges that teach new techniques and refine your skills, and the satisfaction of bringing a damaged family photograph back to life and seeing the recognition and emotion it brings to family members makes the effort of learning and practicing restoration techniques deeply rewarding for anyone who values family history and photographic heritage. The final encouragement is to start with your own family photographs, scanning and restoring even one damaged image to experience the process and results firsthand, and to continue preserving your family photographic heritage by restoring, organizing, and sharing the images that tell your family story, ensuring that the people, places, and moments captured in old photographs continue to be seen, remembered, and appreciated for generations to come through the gift of digital restoration that brings fading memories back into clear view.
?? 2025 Complete Guide to Image Restoration | All Rights Reserved
This guide provides educational information about digital photo restoration techniques. Results vary based on photograph condition, available reference materials, and skill level. Always work on digital copies of original photographs and preserve original prints in appropriate archival storage conditions to maintain their physical preservation alongside digital restoration efforts for complete family photographic heritage protection.
Was this article helpful?
Pro Pixel Agency
Want this done for you? Try our image editing free.
Send a sample, get the finished result back, and only then decide. Clear prices, no commitment.