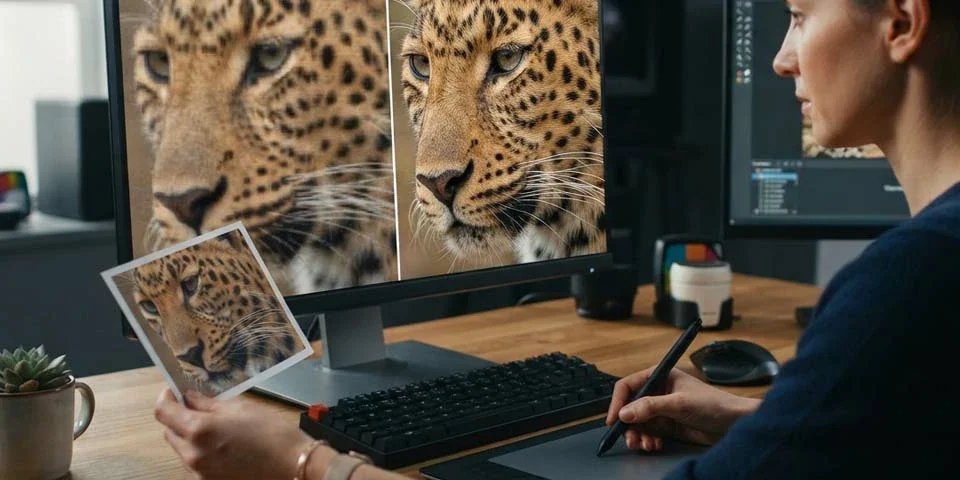
There is nothing more disappointing than a beautiful photograph that turns into a soft, blurry print. The image looked perfect on screen, but once it was enlarged for the printer, the edges dissolved and the fine details vanished. For years, enlarging a small image was a losing battle against pixelation.
Artificial intelligence has changed that completely. AI upscaling tools can now enlarge images far beyond their original size while reconstructing detail, sharpening edges, and preserving texture. A small product photo can become a crisp poster, and a low-resolution image can be printed with professional quality.
This guide shows you how to use AI image upscaling tools for better prints. You will learn how upscaling works, which tools to choose, how to prepare your images, and how to get crisp, professional prints every time.
What You Will Learn
- Why Upscaling Matters for Prints
- How AI Upscaling Actually Works
- Traditional Upscaling vs. AI Upscaling
- Understanding Resolution and DPI
- What Makes a Good Source Image
- Choosing an AI Upscaling Tool
- Popular AI Upscaling Tools
- Preparing Images Before Upscaling
- Choosing the Right Upscale Factor
- Reducing Noise Before Enlarging
- Sharpening After Upscaling
- Upscaling Product Photos for Print
- Printing Sizes and Resolution
- Choosing the Right File Format
- Colour Management for Prints
- Testing Before You Print
- Common Upscaling Mistakes
- A Workflow for Perfect Prints
- A Checklist for Print-Ready Images
- Upscaling for Different Print Products
- Combining Upscaling with Other AI Tools
- Common Questions About AI Upscaling
- Final Takeaways
1. Why Upscaling Matters for Prints
Printing places enormous demands on an image. A photograph that looks crisp on a phone screen may contain only a fraction of the pixels needed for a large print. When you enlarge it, each pixel grows, and without enough of them the image turns soft, blocky, and unprofessional.
The solution is upscaling — increasing the number of pixels in an image so it can be printed at a larger size with acceptable detail. Historically, upscaling simply stretched the image, which made the softness and pixelation worse. AI has changed the game entirely.
AI upscaling tools analyse the image and reconstruct believable detail that was never captured in the original pixels. Edges become sharp, textures regain their structure, and the enlarged image looks natural rather than stretched. This opens the door to printing from smaller source files.
For product photography, better prints mean higher-quality marketing materials, packaging, and displays. A crisp, large-format product image signals quality and professionalism. AI upscaling makes achieving that far easier than ever before.
2. How AI Upscaling Actually Works
Traditional upscaling is simple mathematics. The software adds pixels and guesses their values by averaging neighbouring ones. The result is a larger image with no real new detail — just bigger, softer pixels. AI upscaling is fundamentally different.
AI upscaling uses deep learning models trained on millions of images. The model recognises patterns — edges, textures, faces, surfaces — and reconstructs plausible detail based on what it has learned those patterns should look like. It does not just enlarge; it reinvents.
This is why AI upscaled images look so much sharper. A staircase edge in a photo becomes crisp because the model knows how edges should look. Fabric texture regains structure because the model understands fabric. The reconstruction is believable enough to fool the eye.
The quality of the result depends on the model and the source. Strong source detail gives the AI more to work with, while a blurry, compressed image forces the model to invent more. Understanding this helps you prepare images for the best possible upscale.
3. Traditional Upscaling vs. AI Upscaling
It helps to understand exactly what you gain by choosing AI upscaling over traditional methods. Traditional interpolation — bilinear, bicubic, and Lanczos — has been used for decades in every photo editor. These methods create smooth transitions between pixels but add no genuine detail.
The result of traditional upscaling is a larger image that looks exactly like the original, only softer. Edges lose their bite, textures blur, and fine lines dissolve. For small enlargements the difference is subtle; for large prints it becomes obvious and unflattering.
AI upscaling reconstructs detail that traditional methods cannot. It sharpens edges, rebuilds textures, and produces enlargements that look natural at print sizes. The difference is most dramatic with product photography, where crisp edges and fine details matter enormously.
Traditional methods are still useful for minor enlargements and previews. But when the goal is a large, professional print, AI upscaling is now the clear choice. It is the difference between a soft enlargement and a print that looks sharp and intentional.
| Feature | Traditional Upscaling | AI Upscaling |
|---|---|---|
| Method | Pixel interpolation | Deep learning reconstruction |
| New detail | None | Reconstructed detail |
| Edges | Soft, blurred | Sharp, defined |
| Texture | Lost at large sizes | Preserved and rebuilt |
| Best for | Small enlargements | Large, professional prints |
4. Understanding Resolution and DPI
To upscale intelligently, you must understand resolution and DPI. Resolution is the total number of pixels in an image — for example, 3000 by 2000 pixels. DPI, or dots per inch, describes how densely those pixels are printed. Together they determine print size and quality.
The simple relationship is: print size equals resolution divided by DPI. A 3000-pixel-wide image printed at 300 DPI produces a 10-inch-wide print. At 150 DPI it produces a 20-inch print, but with noticeably less detail. Higher DPI means sharper, more detailed prints.
The standard for high-quality prints is 300 DPI for close viewing, and around 150 DPI is acceptable for large format viewed from a distance. AI upscaling lets you reach these DPI levels from smaller source images by increasing the pixel resolution first.
Before upscaling, calculate your target. Decide the print size you want and the DPI you need, then work out the pixel dimensions required. That number tells you exactly how much your source image must be enlarged.
5. What Makes a Good Source Image
The best upscale in the world cannot create detail that is not there to reconstruct. Your source image determines the ceiling of your print quality. A sharp, clean, well-exposed image will upscale beautifully; a blurry, noisy, compressed one will remain disappointing at any size.
Start with the highest resolution original you have. Never work from a compressed version or a screenshot. The more genuine detail in the source, the more the AI can reconstruct believably. Original camera files and high-quality exports are ideal.
Sharp focus is essential. An out-of-focus image upscales into a larger out-of-focus image. Motion blur and camera shake cannot be fixed by upscaling. Photograph carefully, and your source will reward you at print size.
Exposure matters too. An image that is too dark or too bright has already lost detail in shadows or highlights. Correct exposure preserves the detail the AI needs. Your source is the foundation — build it well.
6. Choosing an AI Upscaling Tool
The market offers many AI upscaling tools, from simple online services to powerful desktop applications. Choosing the right one depends on your workflow, volume, and quality needs. There is no single best tool — only the best tool for your situation.
Online tools are convenient for occasional use. Upload an image, choose your settings, and download the result. They are easy and fast, but they require internet, and very large images may be limited on free tiers. For occasional prints, they are an excellent choice.
Desktop applications offer more control, better privacy, and batch processing. You can upscale many images at once, fine-tune settings, and handle very large files without upload limits. Serious product photographers often invest in a desktop tool.
Whichever you choose, test it on a few of your own images before committing. Every tool's model behaves differently on different subjects. The right tool is the one that produces the most natural, detailed results for your photographs.
7. Popular AI Upscaling Tools
Several AI upscaling tools have become trusted names in photography. Each offers a slightly different balance of quality, speed, and ease of use. Familiarising yourself with the landscape helps you choose wisely and get the best results for your prints.
Topaz Gigapixel AI is a desktop favourite among photographers, known for its excellent detail reconstruction and flexible controls. It handles product photos, textures, and fine edges beautifully, making it a strong choice for serious print work.
ON1 Resize AI and other integrated editors offer upscaling within a broader photo-editing workflow. If you already use one of these applications, built-in AI resize keeps your entire process in one place.
Online tools such as those from major image libraries and dedicated upscaling websites offer convenience for quick jobs. Whichever tool you select, test it thoroughly — the model that makes your product images look their best is the right one for you.
8. Preparing Images Before Upscaling
A little preparation dramatically improves your upscale results. Clean, stable images give the AI the best material to work with. Take five minutes to prepare, and your prints will thank you.
First, correct exposure and colour in your editor. Balanced brightness and accurate colour give the AI clean information. Then remove obvious imperfections — dust, spots, and scratches that the AI might interpret and amplify into larger flaws.
Crop to your final composition before upscaling. Cropping after enlarging wastes resolution and forces you to upscale more than necessary. Decide the framing first, then enlarge the final crop.
Export a clean, high-quality file for upscaling. Avoid heavy JPEG compression, which introduces artefacts the AI may reinforce. A TIFF or a high-quality PNG gives the AI the richest source to work from.
9. Choosing the Right Upscale Factor
The amount you upscale matters as much as the tool you use. Upscale too little and you may not reach your target print size. Upscale too much and the AI must invent more detail, risking artefacts and an unnatural look. The right factor is the smallest that meets your needs.
Calculate your target resolution first. For a 20-inch print at 300 DPI, you need 6000 pixels across. If your source is 2000 pixels, you need a 3x upscale. If it is 4000 pixels, a 1.5x upscale. Always upscale to exactly what you need, not just for the sake of a round number.
For very large enlargements, upscale in steps rather than all at once. Some tools offer a higher-quality multistage mode that produces cleaner results than a single huge jump. Check whether your tool recommends this for large factors.
Compare the result at a 1.5x, 2x, and 3x enlargement of the same image. You will see where the AI stops adding believable detail and starts smoothing or inventing. That point is your practical ceiling.
| Print Size | 300 DPI Pixels | 150 DPI Pixels |
|---|---|---|
| 8 x 10 in | 2400 x 3000 | 1200 x 1500 |
| 12 x 18 in | 3600 x 5400 | 1800 x 2700 |
| 16 x 24 in | 4800 x 7200 | 2400 x 3600 |
| 24 x 36 in | 7200 x 10800 | 3600 x 5400 |
10. Reducing Noise Before Enlarging
Image noise — the grain visible in low-light and high-ISO shots — behaves badly during upscaling. As the image grows, the noise grows too, and the AI can amplify it into blotchy, artificial patterns. Reducing noise before upscaling prevents this.
Use a careful noise reduction in your editing software on the original image. Modern tools remove noise while preserving detail impressively. Keep the reduction moderate — heavy noise reduction can erase the very textures you want to keep.
Some AI upscalers include built-in denoising that prepares the image as part of the enlargement process. If your tool offers this, test it against pre-denoised input and use whichever gives cleaner, sharper results.
When photographing for prints, always prefer the lowest practical ISO. Clean source images need minimal denoising and upscale with the most believable detail. Prevention at capture remains the best strategy.
11. Sharpening After Upscaling
Even the best AI upscale benefits from a final sharpen. Upscaling adds pixels, and those new pixels can leave edges feeling slightly soft. A careful sharpen after upscaling restores the crispness that makes prints look professional.
Avoid over-sharpening. Excessive sharpening creates halos — bright outlines around edges — and emphasises noise. The goal is a natural, crisp look. Use a moderate amount and inspect the image at 100 percent before accepting it.
Sharpen only after the final resize and before export. Sharpening earlier is wasted, because the upscale will soften your work again. The order — upscale, then sharpen — is essential for the best result.
Consider sharpening for the specific print medium. Matte papers absorb sharpness, while glossy papers hold every detail. A touch more sharpening for matte prints often produces a cleaner result. Match your sharpening to how the print will actually be viewed.
12. Upscaling Product Photos for Print
Product photography upscales exceptionally well because it is full of crisp edges, defined shapes, and clean backgrounds. These are exactly the features AI models understand best. A sharp product image can be enlarged to poster size with remarkable fidelity.
Clean, smooth backgrounds are your friend. The AI reconstructs flat colour and simple gradients easily, producing uniform, spotless backgrounds at any size. Keep your product photography backgrounds clean and the upscaled prints will look immaculate.
Text and fine details deserve special attention. Product labels, logos, and embossed text must remain crisp — blurry text ruins a print's professional look. Check these details carefully in your upscaled result and use a higher-quality model if text softens.
Upscaling also benefits your digital catalog. Enlarged images let you crop creatively, zoom into details for social media, and maintain quality across display sizes. The same upscaled file serves both print and screen.
13. Printing Sizes and Resolution
Every print size has a resolution requirement, and matching them correctly is the key to sharp prints. The relationship is simple: more pixels spread over a larger area means fewer per inch and softer detail. Upscaling restores the pixel density you need.
For small prints like 8 x 10 inches, 300 DPI produces exceptional sharpness for close viewing. For medium sizes like 12 x 18, 300 DPI remains ideal. Large format prints like 24 x 36 are often viewed from a distance, so 150 DPI is commonly acceptable.
Know your printer. Inkjet printers often recommend specific resolution ranges, and some excellent printers produce sharp results at lower DPI. Consult your printer's documentation and test prints to find the quality sweet spot.
When in doubt, upscale to 300 DPI. It gives you the best possible quality and lets you crop or resize down without loss. Overshooting resolution is cheap; undershooting produces disappointing prints.
14. Choosing the Right File Format
The file format you export determines how well your upscaled image survives the journey to print. Lossless formats preserve every pixel; lossy formats discard data and can introduce artefacts that undermine your work.
TIFF is the professional standard for print. It is lossless, supports high bit depth, and preserves all the detail your AI upscale created. Many print services recommend TIFF for maximum quality. Its larger file size is worth the fidelity.
PNG is a lossless format that handles clean edges and graphics well, making it a solid choice for product images with text and crisp shapes. It does not carry print colour profiles as conveniently as TIFF.
High-quality JPEG can work for prints, especially at large sizes where file size matters. Export at the highest quality setting to minimise compression. But for the best prints, export a lossless file and let the printer handle the final conversion.
15. Colour Management for Prints
A perfectly sharp print is wasted if the colours are wrong. Screens display colour in RGB, while printers work in CMYK and rely on colour profiles to translate accurately. Without proper colour management, prints come out darker, duller, or differently tinted than you expect.
Calibrate your monitor so what you see is what you print. A hardware calibrator adjusts your screen to a known standard, ensuring your editing decisions are trustworthy. Calibration is the foundation of accurate print colour.
Work in a wide-gamut colour space like ProPhoto RGB or Adobe RGB for editing, then convert to the appropriate profile for your printer or lab when exporting. Your print service will specify which profile to use — follow their instructions exactly.
Soft-proofing in your editor shows how the image will look with the print profile applied. Use it to catch colours that fall outside the printer's gamut and adjust before wasting ink and paper. Colour management turns good upscaling into great prints.
16. Testing Before You Print
A full-size print is expensive in ink, paper, and time — so test before committing. A small test print reveals problems with sharpness, colour, and contrast that a screen simply cannot show. Testing turns guesswork into certainty.
Print a representative crop at the intended size and inspect it under normal lighting. Look for softness, halos, and colour shifts. If the crop looks excellent, the full print will too. If not, adjust your upscale or sharpening and test again.
Test on the exact paper you will use for the final print. Every paper has a different surface, brightness, and ink behaviour. A proof on the wrong paper tells you little about the final result.
View the test print in the same lighting where it will be displayed. Print colours shift under warm and cool light. A test viewed correctly the first time saves you from a surprising, expensive mistake later.
17. Common Upscaling Mistakes
The most common upscaling mistake is upscaling a poor source and expecting magic. AI can reconstruct detail, but it cannot create it from nothing. Blurry, soft, or heavily compressed images remain disappointing at any size. Start from the best source you have.
Upscaling too aggressively is the second trap. A 10x jump from a small source forces the AI to invent an enormous amount of detail, producing a plastic, unnatural look. Upscale to the minimum factor that meets your print size, and use multistage enlargements for large targets.
Skipping colour management ruins good work. A perfectly sharp, perfectly upscaled image printed without a colour profile can look dull and lifeless. Calibrate, profile, and soft-proof before you print.
Finally, ignoring test prints is a costly gamble. Always test a crop on your real paper before printing large. A few minutes of testing saves time, money, and disappointment.
| Mistake | Result | Fix |
|---|---|---|
| Poor source image | Soft, blurry print | Start from the best original |
| Upscaling too much | Unnatural, plastic look | Use the minimum factor needed |
| Skipping colour profiles | Dull, wrong-colour prints | Calibrate and profile properly |
| No test print | Expensive surprises | Proof a crop before printing |
18. A Workflow for Perfect Prints
A reliable workflow turns AI upscaling from a novelty into a dependable part of your print process. Build a repeatable sequence, and every print you produce will be sharp, colourful, and professional.
Start with selection: choose your best, sharpest source image. Then prepare it — correct exposure and colour, remove dust and imperfections, and crop to final composition. Clean preparation makes every later step easier.
Calculate your target resolution, denoise if needed, and upscale to exactly the required pixels. Sharpen after upscaling, then export a lossless file with the correct colour profile. Soft-proof, print a test, and only then print the final.
Document your settings for each paper and print size. Over time you will build a reference that produces excellent prints with minimal effort. A disciplined workflow is what separates occasional good results from consistent professional quality.
19. A Checklist for Print-Ready Images
Use this checklist before you print any upscaled image:
- Choose the sharpest, highest-resolution source image
- Correct exposure, colour, and remove imperfections
- Crop to final composition before upscaling
- Calculate the resolution your print size needs
- Reduce noise on noisy source images
- Upscale to the minimum required factor
- Sharpen after upscaling, moderately
- Export a lossless file with the correct profile
- Soft-proof and check colours before printing
- Print a test crop on your final paper first
20. Upscaling for Different Print Products
Different print products place different demands on your upscaled images. A large fine-art poster is viewed from a distance and forgives a lower DPI, while a small product tag is held close and demands crisp, precise detail. Match your upscaling to the medium.
Packaging and labels are printed on glossy or coated papers with fine screens. Text, barcodes, and fine graphics must stay razor-sharp, so upscale to high DPI and check text edges carefully. Blurry text on packaging is instantly noticeable and unprofessional.
Large-format banners and billboards are seen from far away, so moderate resolution suffices, but the image must hold up across a huge area. Upscale enough to avoid softness at the intended viewing distance, then let the printer's software handle the final sizing.
Fabric and textile printing, used for apparel and soft signage, absorbs sharpness into the weave. Upscale to the maximum practical resolution and sharpen for the material. Understanding your print product tells you how much detail you need to create.
| Print Product | DPI Target | Key Focus |
|---|---|---|
| Product tags and labels | 300+ | Crisp text and graphics |
| Packaging | 300 | Sharp text, clean colours |
| Posters and art | 150–300 | Overall detail and depth |
| Banners, large format | 75–150 | Sharpness at viewing distance |
| Fabric and textile | 300+ | Detail absorbed into weave |
21. Combining Upscaling with Other AI Tools
AI upscaling works beautifully alongside other AI tools in a complete image workflow. AI denoising cleans up noisy source images before enlarging, giving the upscaler cleaner material. AI sharpening, applied after the upscale, restores crisp edges without the halos of manual sharpening.
AI background removal and retouching can prepare a product image before you enlarge it. Cleaning the background, removing imperfections, and perfecting the product's presentation means the upscale only has to enlarge good material. Order matters: clean first, then upscale.
AI colour tools can expand dynamic range, balance tones, and match colours across a series of images destined for a single print campaign. Consistent colour across products makes your printed materials look cohesive and professional.
The key is controlling the sequence. Clean and correct first, upscale second, sharpen and finish last. Each AI tool builds on the previous one's result, and a disciplined order produces far better prints than a haphazard approach.
22. Common Questions About AI Upscaling
Many photographers ask whether AI upscaling is real detail or an illusion. The answer is a combination. The AI reconstructs believable detail based on learned patterns, which looks real and natural, but the new detail is an informed guess rather than captured information. This is why a strong source matters.
Another frequent question is how large you can safely upscale. Modern tools handle 4x to 8x enlargements impressively, and some go further with careful settings. The practical limit depends on your source quality and the viewing distance of the print. Test to find your ceiling.
Photographers also wonder whether upscaling is worth it when they could reshoot. When reshooting is possible, it is usually the best choice — real captured detail beats reconstructed detail. But for historical images, archived files, or subjects you cannot re-shoot, upscaling is the only path, and it works well.
Finally, people ask if upscaled images look artificial up close. On clean product photographs, the results are remarkably natural. Close inspection of complex textures may reveal the AI's smoothing, which is why testing at print size is always recommended.
23. Final Takeaways
AI image upscaling has transformed what is possible in print. Images that were once too small for a poster can now be enlarged with believable, professional detail. The tools are powerful, but they work best in skilled hands.
Start from a sharp, clean source. Prepare it carefully, calculate your resolution needs, and upscale to the minimum factor that meets them. Denoise before, sharpen after, and always export a lossless file with correct colour.
Respect the craft of colour management and test prints. A sharp image with accurate colour, proofed on the right paper, becomes a print you are proud to display.
AI does the heavy lifting — your preparation makes the difference between a good print and a perfect one.
Bottom line:AI upscaling creates the detail you need for large prints, but quality depends on your source, preparation, and workflow. Start sharp, upscale wisely, manage colour, and test before you print.
← Previous: Photographing Glass & Transparent Objects
Next: Best Courses for Product Photography →
Was this article helpful?
Pro Pixel Agency
Want this done for you? Try our image editing free.
Send a sample, get the finished result back, and only then decide. Clear prices, no commitment.