
From aperture and bokeh to white balance and exposure triangle — over 100 photography terms explained in plain English for beginners
📷 Camera Basics
🔬 Technical Terms
🎨 Creative Concepts
Photography has its own language. When you are starting out, terms like aperture, ISO, bokeh, exposure triangle, and depth of field can feel overwhelming. But understanding these terms is the key to moving from automatic mode to full creative control over your camera. Every professional photographer started where you are now — learning one term at a time, building their vocabulary, and gradually mastering the language of photography.
This comprehensive glossary covers the most important photography terms every beginner needs to know. We have organized them into categories — camera basics, exposure, lenses, lighting, composition, post-processing, and more — so you can find what you need quickly. Each term is explained in simple, practical language with examples you can apply to your own photography. Bookmark this page and refer back to it as you learn. Before long, you will be speaking photography fluently.
📷 The Exposure Triangle
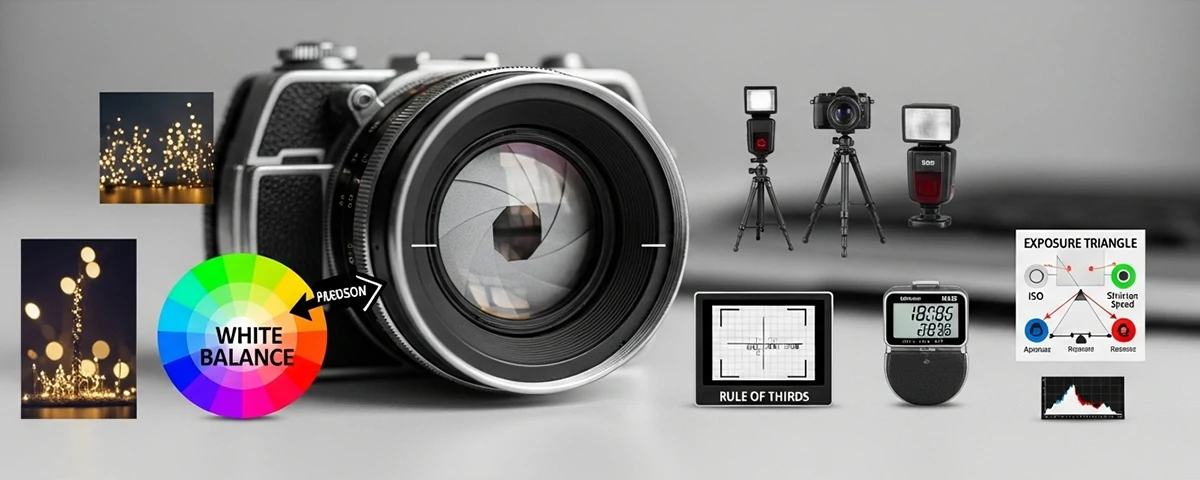
The exposure triangle is the foundation of all photography. It describes the relationship between three essential settings — aperture, shutter speed, and ISO — that determine how bright or dark your photo will be. Understanding these three elements and how they work together is the first step to taking full control of your camera.
Aperture is the opening in your lens that lets light into the camera. It is measured in f-stops (like f/1.4, f/2.8, f/5.6, f/11, f/22). A lower f-number means a wider opening that lets in more light, while a higher f-number means a smaller opening that lets in less light. Aperture also controls depth of field — a wide aperture (low f-number) creates a shallow depth of field with a blurred background, perfect for portraits. A narrow aperture (high f-number) creates a deep depth of field where everything is in focus, ideal for landscapes. The aperture scale can be confusing because the numbers seem backward — f/1.4 is a very wide opening and f/22 is a very narrow one — but with practice, it becomes intuitive.
Shutter speed is how long your camera's shutter stays open to let light hit the sensor. It is measured in fractions of a second (like 1/1000, 1/250, 1/60, 1/30) or in full seconds for long exposures. A fast shutter speed like 1/1000 freezes motion — perfect for sports, wildlife, and capturing sharp images of moving subjects. A slow shutter speed like 1/30 or slower creates motion blur — intentional blur can convey movement and energy, like the smooth flow of a waterfall or light trails from cars at night. The general rule for handheld shooting is to use a shutter speed at least as fast as the reciprocal of your focal length — for a 50mm lens, use at least 1/50 second to avoid camera shake. Use a tripod for shutter speeds slower than this guideline.
ISO measures your camera sensor's sensitivity to light. A lower ISO number (100, 200) means less sensitivity and produces cleaner, sharper images with less digital noise. A higher ISO number (800, 1600, 3200, 6400) means more sensitivity, allowing you to shoot in darker conditions, but at the cost of increased noise or grain in your images. The key to great photography is using the lowest ISO possible while still achieving your desired aperture and shutter speed. Modern cameras handle high ISO remarkably well — ISO 3200 on a 2024 camera looks better than ISO 800 did on a camera from 2010. Do not be afraid to raise your ISO when needed, but always check your images for unacceptable noise and adjust accordingly.
An exposure triangle infographic showing the three elements interconnected. The image shows a triangle diagram with Aperture at the top left, Shutter Speed at the top right, and ISO at the bottom center. Each corner has a visual example. For Aperture: a split comparison showing a portrait taken at f/1.8 with a creamy blurred background versus the same scene at f/16 with everything in focus from front to back. A label explains: "Wide aperture (low f-number) = shallow depth of field, more light. Narrow aperture (high f-number) = deep depth of field, less light." For Shutter Speed: a split comparison showing a waterfall shot at 1/1000 second with frozen water droplets versus the same waterfall shot at 1 second with smooth, silky water. A label explains: "Fast shutter speed freezes motion. Slow shutter speed blurs motion." For ISO: a split comparison showing the same dimly lit scene shot at ISO 100 (dark but clean) and ISO 6400 (bright but with visible grain/noise). A label explains: "Low ISO = clean image, needs more light. High ISO = bright image in low light, more noise." In the center of the triangle, a note reads: "Change one setting and you must adjust at least one other to maintain proper exposure. This is the exposure triangle — the foundation of all photography."
🔬 Lens and Focus Terminology
Your lens is the eye of your camera, and understanding lens terminology is essential for choosing the right lens for each situation and getting sharp, properly focused images. From focal length to autofocus modes, these terms will help you understand how lenses work and how to use them effectively.
Focal length, measured in millimeters (mm), determines the angle of view and magnification of your lens. A shorter focal length (like 18mm or 24mm) gives a wide-angle view, capturing more of the scene and making subjects appear smaller — great for landscapes, architecture, and environmental portraits. A longer focal length (like 85mm, 135mm, or 200mm) gives a narrow, magnified view that brings distant subjects closer and compresses perspective — ideal for portraits, wildlife, and sports. A standard focal length (around 50mm) closely matches human vision and is versatile for many types of photography. Zoom lenses cover a range of focal lengths (like 24-70mm or 70-200mm), while prime lenses have a single fixed focal length and are typically sharper and faster than zooms.
Depth of field is the zone of acceptable sharpness in your image — the area in front of and behind your focus point that appears sharp. A shallow depth of field means only a small area is in focus while the background and foreground are blurred — this is the look most photographers love for portraits, where the subject is sharp and the background melts away into soft blur. A deep depth of field means most of the image from foreground to background is in focus — essential for landscapes where you want everything sharp. Depth of field is controlled by three factors: aperture (wider aperture = shallower depth of field), focal length (longer lens = shallower depth of field), and distance to subject (closer to subject = shallower depth of field). Understanding these relationships gives you precise creative control over what is sharp and what is not in your images.
Autofocus (AF) modes determine how your camera focuses on subjects. Single-shot autofocus (AF-S or One-Shot AF) locks focus when you half-press the shutter and holds it — perfect for stationary subjects like portraits and landscapes. Continuous autofocus (AF-C or AI Servo AF) continuously adjusts focus as the subject moves — essential for sports, wildlife, and any moving subject. Automatic autofocus (AF-A or AI Focus AF) lets the camera decide between single and continuous modes. Most modern cameras also offer face detection and eye-tracking autofocus, which automatically detects and focuses on human or animal eyes — a game-changer for portrait and wildlife photography. Manual focus (MF) gives you complete control by turning the focus ring on the lens — useful for macro photography, low-light situations where autofocus struggles, and when you want precise control over your focus point.
Bokeh is the aesthetic quality of the out-of-focus areas in a photograph. The word comes from Japanese and means "blur" or "haze." Good bokeh is smooth, creamy, and pleasant to the eye, while bad bokeh is busy, distracting, or double-edged. Bokeh is influenced by the lens design — lenses with rounded aperture blades tend to produce smoother, more pleasing bokeh. The quality of bokeh is one reason photographers invest in premium prime lenses like the 85mm f/1.4 or 50mm f/1.2, which are renowned for their beautiful bokeh rendering. Shooting with a wide aperture, close to your subject, and with your subject far from the background produces the strongest bokeh effect.
A lens and focus visual guide. The main image shows a comparison grid of four different focal lengths shooting the same scene from the same position. Frame 1 "24mm Wide Angle" shows a vast landscape scene with a small person in the foreground — the entire scene is captured with expansive view and some perspective distortion at the edges. Frame 2 "50mm Standard" shows a more natural perspective of the same scene — the person appears larger, less distortion, and the view feels natural like human vision. Frame 3 "85mm Portrait" shows a head-and-shoulders crop of the person with the background blurred into creamy bokeh — the subject is isolated and flattering compression is visible. Frame 4 "200mm Telephoto" shows a tight close-up of the person's face with the background heavily compressed and blurred — distant objects appear closer together and background elements are magnified. Below the comparison, a depth of field illustration shows a ruler-like scale demonstrating how aperture, focal length, and distance affect sharpness. A set of three sliders shows: Aperture set to f/1.8 creates a narrow sharp zone (2 inches), distance to subject at 3 feet, and focal length at 85mm — the result is a shallow depth of field with subject sharp and background blurred. A callout explains: "The combination of wide aperture, long focal length, and close subject distance creates the strongest background blur. Adjust any of these three factors to control how much of your image is in focus."
🎨 Lighting and Color Terms
Lighting is the essence of photography — the word itself means "drawing with light." Understanding lighting terminology will help you recognize different types of light, control how light affects your images, and make intentional creative decisions about the mood and atmosphere of your photographs.
White balance is the adjustment of colors in your image to make white objects appear white under different lighting conditions. Different light sources have different color temperatures — candlelight is warm (orange/yellow), daylight is neutral, and shade or overcast sky is cool (blue). Color temperature is measured in Kelvin (K) — typical daylight is around 5500K, while a candle flame is around 1800K and a clear blue sky is around 9000K. Your camera has white balance presets for different lighting situations (daylight, cloudy, shade, tungsten, fluorescent), and you can also set a custom white balance or shoot in RAW to adjust white balance during editing. Getting white balance right ensures natural-looking skin tones and accurate colors in your images.
Natural light refers to available sunlight, as opposed to artificial light from flashes or studio strobes. Golden hour — the hour after sunrise and the hour before sunset — is prized by photographers for its warm, directional light that creates flattering portraits and dramatic landscapes. The quality of natural light changes throughout the day — soft and diffused in the morning and evening, harsh and contrasty at midday, and often beautifully soft on overcast days. Learning to see and work with natural light is one of the most important skills a photographer can develop. The direction of light relative to your subject also matters — front lighting illuminates the subject evenly, side lighting creates depth and texture, backlighting creates dramatic silhouettes or rim light, and diffused light from an overcast sky or open shade provides soft, even illumination ideal for portraits.
Histogram is a graphical representation of the tones in your image, showing the distribution of shadows, midtones, and highlights. The left side of the histogram represents black and shadow areas, the middle represents midtones, and the right side represents highlights and white areas. A well-exposed image typically has a histogram that extends across the full range without clipping at either end. If the histogram is bunched up against the left edge, your image is underexposed (too dark). If it is bunched against the right edge, your image is overexposed (too bright). If it spikes at both ends, you have lost detail in both shadows and highlights. The histogram is more reliable than your camera's LCD screen for judging exposure, especially in bright outdoor conditions where the screen can be hard to see.
High dynamic range (HDR) refers to scenes that contain a wider range of brightness levels than your camera can capture in a single shot. For example, a landscape with bright sky and dark foreground has a high dynamic range — if you expose for the sky, the foreground is too dark, and if you expose for the foreground, the sky is blown out. HDR photography solves this by taking multiple exposures of the same scene (bracketing) and combining them in post-processing to create an image with detail in both shadows and highlights.
A lighting and color visual guide. The top section "White Balance Comparison" shows the same portrait photographed under the same lighting but with different white balance settings. The first image is set to "Daylight" (5500K) and looks neutral and natural. The second image is set to "Tungsten" (3200K) and looks very cool/blue. The third image is set to "Shade" (7000K) and looks very warm/yellow. A note explains: "Matching white balance to your light source creates natural colors." The bottom section "Lighting Direction" shows four photos of the same subject lit from different directions. Frame 1 "Front Light" — evenly lit with flat shadows. Frame 2 "Side Light" — strong shadows create drama. Frame 3 "Back Light" — silhouette with rim light. Frame 4 "Diffused Light" — soft, even, flattering. A callout: "The quality, direction, and color of light are the three most important elements in any photograph."
📐 Composition and Framing Terms
Composition is how you arrange the elements in your frame to create a visually appealing and meaningful photograph. Great composition draws the viewer's eye through the image, creates emotional impact, and elevates a snapshot into a photograph. These composition terms and techniques are the building blocks of strong visual storytelling.
Rule of thirds is the most fundamental composition guideline. Imagine dividing your frame into a 3x3 grid with two horizontal and two vertical lines. The rule of thirds suggests placing your most important elements — your subject, the horizon, key points of interest — along these lines or at their intersections. This creates more dynamic, balanced, and interesting compositions than placing your subject dead center. Most cameras have a grid overlay option that shows the rule of thirds lines. While the rule of thirds is a guideline, not a rule, it is an excellent starting point for composing stronger images. Once you understand it, you can intentionally break it for creative effect.
Leading lines are lines within your composition that guide the viewer's eye toward your main subject or through the image. Roads, fences, railway tracks, bridges, shorelines, architectural lines, shadows, and even a person's gaze can serve as leading lines. Diagonal lines are particularly effective because they create a sense of movement and energy. Leading lines work because human eyes are naturally drawn to follow lines and paths. When composing a photo, look for existing lines in the scene and position yourself to use them as compositional tools that direct attention to your subject. The most effective leading lines start near the bottom or corner of the frame and lead inward toward the main focal point, creating depth and guiding the viewer through the image.
Negative space is the empty or unoccupied area around your subject. Including generous amounts of negative space can make your subject stand out more powerfully and create a sense of scale, isolation, or tranquility. Negative space does not have to be white or empty — it can be a plain sky, a calm body of water, a blank wall, or an out-of-focus background. The key is that negative space is visually simple and does not compete with your subject for attention. Minimalist compositions that use negative space effectively feel clean, modern, and intentional. Negative space is particularly effective in portrait and product photography, where you want the viewer's attention focused entirely on the subject.
Framing uses elements within the scene to create a frame around your subject. Doorways, windows, arches, tree branches, tunnels, and even other people can serve as natural frames that isolate your subject and add depth and context to the image. Foreground framing creates a sense of looking through something to see the subject, which adds layers and dimension to an otherwise flat image. Framing also helps direct the viewer's eye exactly where you want it to go — the frame blocks out distractions and emphasizes the subject within.
A composition techniques guide showing four different composition methods applied to the same scene. The scene is a coastal landscape with a pier extending into the ocean, a dramatic sky, and a person standing at the end of the pier. Image 1 "Rule of Thirds" shows the photo with the rule of thirds grid overlaid — the horizon sits on the bottom third line, the pier leads from the bottom left intersection toward the center, and the person stands at the top right intersection. Image 2 "Leading Lines" shows the same scene with the pier's railing lines highlighted — the lines start at the bottom corners and converge toward the person, pulling the viewer's eye directly to the subject. Image 3 "Negative Space" shows a version with the person small in the frame, surrounded by vast sky and ocean — the negative space emphasizes solitude and scale. Image 4 "Framing" shows the scene photographed through a natural arch of rocks in the foreground — the dark rock frame encircles the person and pier, adding depth and a sense of discovery. A callout provides: "Composition rules are guidelines, not laws. Learn them thoroughly so you understand why they work, then feel free to break them intentionally for creative effect."
💻 Post-Processing and File Format Terms
Post-processing is where your images come to life. Understanding file formats, editing tools, and image quality terms is essential for managing your digital workflow and producing the best possible final images. Whether you use Lightroom, Photoshop, Capture One, or another editing application, these terms are universal.
RAW vs JPEG is one of the most important decisions you will make about how you capture images. RAW is a file format that contains all the data captured by your camera's sensor without any in-camera processing. RAW files are larger (typically 25-50MB each), require special software to view and edit, and give you maximum flexibility in post-processing — you can adjust white balance, exposure, contrast, and color with minimal quality loss. JPEG is a processed file format where your camera applies white balance, sharpening, color saturation, and compression before saving. JPEG files are smaller (5-10MB) and ready to share immediately, but they offer much less editing flexibility. Professional photographers almost always shoot in RAW because it preserves the maximum image data and editing latitude.
Resolution refers to the amount of detail an image holds, typically measured in megapixels (MP) or dimensions (width x height in pixels). A 24-megapixel camera produces images roughly 6000 x 4000 pixels. Higher resolution means more detail and the ability to make larger prints or crop more aggressively without losing quality. For most photographers, 20-30 megapixels provides an excellent balance of detail and file manageability. For printing, a general guideline is 300 pixels per inch (PPI) for high-quality prints, meaning a 6000 x 4000 pixel image can produce a high-quality print up to 20 x 13.3 inches.
Color space defines the range of colors that can be represented in an image. The two most common color spaces are sRGB (standard Red Green Blue) and Adobe RGB. sRGB is the standard for web viewing, social media, and most consumer displays. Adobe RGB has a wider color gamut, especially in green and cyan ranges, making it preferred for professional printing. If your images are primarily viewed on screens and shared online, sRGB is the safest choice. If you are printing professionally or need the widest possible color range for editing, Adobe RGB is better, but you need to ensure your monitor, software, and printer all support it.
Noise reduction is the process of removing digital noise (grain-like artifacts) from images, particularly those shot at high ISO settings. Modern AI-powered noise reduction tools are remarkably effective, allowing photographers to shoot at ISO 6400 or higher and produce clean, usable images. The key to effective noise reduction is balance — too much makes images look waxy and plastic, too little leaves distracting noise visible. Apply noise reduction selectively — it is most needed in shadow areas and uniform surfaces like skies, and least needed in textured areas where noise is less visible.
A post-processing comparison guide. The main image is a split-screen comparison showing the same photo in RAW (left) and JPEG (right) with editing sliders visible. The RAW side before editing looks flat and underexposed. Editing sliders show adjustments: Exposure +0.7, Contrast +25, Highlights -30, Shadows +40, Whites +15, Blacks -10, Clarity +15, Vibrance +20. The RAW after edit shows dramatic quality improvement. The JPEG side shows the camera-processed version — when the same adjustments are applied, the JPEG shows artifacts, banding in the sky, and reduced ability to recover detail. A note explains: "RAW files contain up to 12-14 stops of dynamic range and allow dramatic adjustments without quality loss. JPEG files contain only 8 stops and editing quickly degrades image quality." A second comparison shows noise reduction: an ISO 6400 image before NR is grainy with visible color noise, while after AI noise reduction it is clean and smooth. A callout: "Post-processing is not cheating. It is an essential part of the photographic process. Develop a consistent editing style that enhances your photographs without making them look over-processed."
📸 Camera Types and Equipment Terms
Understanding different camera types and equipment terminology helps you make informed decisions when buying gear and understand the capabilities and limitations of different camera systems. Whether you are choosing your first camera or expanding your kit, these terms will guide your decisions.
DSLR stands for Digital Single-Lens Reflex. In a DSLR, light enters through the lens, bounces off a mirror inside the camera body, and passes through a pentaprism to the optical viewfinder, showing you exactly what the lens sees. When you press the shutter, the mirror flips up and light hits the image sensor. DSLRs offer excellent image quality, extensive lens ecosystems, optical viewfinders, and robust battery life. However, they are larger and heavier than mirrorless cameras, and the mirror mechanism creates vibration and noise. While mirrorless cameras have largely replaced DSLRs in the professional market, used DSLRs remain excellent value for photographers on a budget.
Mirrorless cameras are the modern standard. Unlike DSLRs, they have no mirror mechanism — light passes directly to the sensor, and the image is displayed on an electronic viewfinder (EVF) or the rear LCD screen. This makes mirrorless cameras smaller, lighter, quieter, and simpler. Electronic viewfinders offer real-time exposure preview, focus peaking, and the ability to review images without taking your eye from the viewfinder. Autofocus on mirrorless cameras is typically faster and more accurate than DSLRs, especially for face and eye detection. The main trade-offs are shorter battery life and sometimes slower startup times. Every major camera manufacturer now prioritizes mirrorless systems.
Full-frame vs crop sensor describes the size of the image sensor. A full-frame sensor measures approximately 36mm x 24mm — the same size as a frame of 35mm film. A crop sensor (APS-C) is smaller, about 22mm x 15mm. Full-frame offers better low-light performance, wider dynamic range, shallower depth of field, and wider angles of view with the same lenses. Crop sensors are more affordable, extend the effective reach of telephoto lenses (a 200mm lens on a crop sensor has an effective field of view of 320mm due to the 1.5x crop factor), and allow smaller, lighter camera bodies. For beginners, crop-sensor cameras offer excellent value. Both sensor types can produce professional-quality images.
Image stabilization (IS) reduces blur caused by camera shake, allowing you to shoot at slower shutter speeds without introducing blur. There are two types: in-body image stabilization (IBIS), where the camera sensor moves to compensate for movement, and lens-based stabilization (VR or OS). The best systems combine both for maximum effectiveness, providing up to 5-8 stops of stabilization. IS should be turned off when using a tripod, as it can introduce slight movement when the camera is already perfectly still.
A camera types comparison guide. Three camera types arranged side by side. The first "DSLR" shows a larger body with mirror box hump and optical viewfinder — labels point to: optical viewfinder, mirror mechanism, phase-detection AF sensor. Advantages listed: excellent battery life, optical viewfinder, extensive used lens options. The second "Mirrorless" shows a smaller, sleeker body with EVF — labels point to: electronic viewfinder, IBIS, fast hybrid AF, silent shutter. Advantages: smaller/lighter, exposure preview, superior AF with eye tracking. Disadvantages: shorter battery life. The third "Smartphone" shows a multi-lens camera module. A callout: "The best camera is the one you will actually carry and use. For most photographers, a mirrorless camera offers the best balance of quality and portability."
🔄 Advanced Photography Techniques
Once you have mastered the basics, these advanced techniques and terms will help you expand your creative possibilities and tackle more challenging photographic situations. Each technique opens new doors for creative expression and problem-solving in the field.
Bracketing is the technique of taking multiple shots at different exposure levels. Most cameras have auto-bracketing that takes three or more shots — one at metered exposure, one or two underexposed, and one or two overexposed. Bracketing is used for HDR photography, for ensuring correct exposure in tricky lighting, and for exposure blending. Bracketing also works for focus stacking — taking multiple shots focused at different distances and combining them for images sharp from foreground to background, common in macro and landscape photography.
Long exposure uses slow shutter speeds (1 second to several minutes) to capture the passage of time in a single image. Effects include smooth, milky water, light trails from cars, star trails, and streaking clouds. Long exposure requires a sturdy tripod, remote shutter release, and often a neutral density (ND) filter to reduce light in daylight. ND filters are like sunglasses for your camera — they come in different strengths (3-stop, 6-stop, 10-stop). Mastering long exposure transforms ordinary scenes into extraordinary, ethereal images.
Macro photography captures extreme close-ups at 1:1 magnification or greater, revealing details invisible to the naked eye — insect eyes, flower petals, fabric textures. True macro requires a dedicated macro lens or extension tubes. Challenges include extremely shallow depth of field (measured in millimeters), magnified camera shake, and difficult lighting. Focus stacking is commonly used in macro to achieve greater depth of field.
Hyperfocal distance is the focus distance that maximizes depth of field, making from half that distance to infinity appear acceptably sharp. It depends on focal length (shorter lenses have shorter hyperfocal distances), aperture (narrower apertures have shorter hyperfocal distances), and sensor size. Smartphone apps calculate hyperfocal distance for any camera and lens combination. Alternatively, focusing one-third into the scene approximates hyperfocal focusing in many situations.
An advanced techniques visual showcase. A grid of four stunning photographs. Photo 1 "Long Exposure" shows a seascape with smooth, misty water and soft cloud movement — 30-second exposure with 10-stop ND filter. Photo 2 "Macro" shows an extreme close-up of a dragonfly's compound eye and wing veins. Photo 3 "Focus Stacking" shows a flower sharp from closest petal to farthest stamen — 15 different focus positions merged. Photo 4 "Light Trails" shows a city street at night with red and white car light trails streaming through the frame. A callout: "Advanced techniques are about seeing the world differently and capturing what the naked eye cannot see. Each technique is a new way of seeing — learn them as tools that expand your creative vision."
🛠️ Essential Photography Accessories
Beyond your camera and lenses, accessories play a crucial role in expanding creative capabilities, protecting equipment, and improving workflow. Understanding accessory terminology helps you make informed purchasing decisions and use your gear more effectively.
Tripod is a three-legged stand that stabilizes your camera for sharp images at slow shutter speeds, long exposures, and precise compositions. Essential for landscape, macro, night, and studio photography. Key features: maximum height, minimum height for low angles, folded length, weight, and load capacity. Ball heads offer quick fluid adjustment; three-way pan-tilt heads offer independent axis control. Carbon fiber tripods are lighter and more expensive than aluminum. A good tripod is a lifetime investment.
Filters modify light entering the lens. UV filters protect your lens from scratches. Polarizing filters (CPL) reduce reflections, deepen blue skies, and increase color saturation — their effects cannot be replicated in post-processing. Neutral density (ND) filters reduce light for slow shutter speeds in bright conditions. Graduated ND filters balance exposure between bright skies and dark foregrounds. Circular polarizers are the most useful for outdoor photography.
Memory cards store your photos. Common types: SD cards (Class 10, UHS-I, UHS-II) and CFexpress. Important factors: read/write speed, capacity (64GB-512GB), and reliability (buy reputable brands). Always carry multiple smaller cards rather than one large card — if a card fails, you only lose a portion of your shoot. Format cards in your camera before each shoot for optimal performance.
An essential accessories flat lay photograph on a wooden desk. Center: carbon fiber tripod with ball head and quick-release plate. Left: filter kit case open showing UV, CPL, and 10-stop ND filters, each labeled. Three SD cards arranged in a row (64GB, 128GB, 256GB) with speed ratings visible. A card reader, remote shutter release cable, wireless trigger, small LED panel with battery pack, microfiber cloth, and lens pen. A callout: "Start with essentials — a reliable tripod, polarizing filter, extra batteries, and extra memory cards. Add accessories as you discover specific needs. Buy quality that will last across multiple camera systems."
🎵 Common Photography Shooting Modes
Your camera's shooting modes are preset configurations that determine how much control you have over aperture, shutter speed, and other settings. Understanding each mode and knowing when to use it is essential for progressing from automatic snapshots to intentional, creative photography. The mode dial on your camera offers several options, and each serves a specific purpose in your photographic journey.
Auto mode gives the camera complete control over all settings. The camera analyzes the scene and selects what it believes are the optimal aperture, shutter speed, ISO, white balance, and focus settings. Auto mode is useful when you need to capture a moment quickly without thinking about settings, but it rarely produces the creative results you want. The camera does not know what you want to emphasize in the image, whether you want motion blur or frozen action, or how much depth of field you desire. Auto mode is helpful for absolute beginners and casual snapshots, but relying on it will limit your growth as a photographer. The sooner you move to semi-automatic or manual modes, the faster you will develop your photographic skills and creative vision.
Aperture priority mode (A or Av) lets you set the aperture and ISO while the camera automatically selects the shutter speed for proper exposure. This is the most popular semi-automatic mode for portrait, landscape, and still-life photographers because it gives you direct control over depth of field while the camera handles the exposure calculation. When shooting a portrait, set a wide aperture like f/1.8 or f/2.8 to create a shallow depth of field with a blurred background. When shooting a landscape, set a narrow aperture like f/11 or f/16 to maximize sharpness throughout the scene. Aperture priority is an excellent mode for learning how aperture affects your images while still getting correctly exposed photos in most situations. Be aware that in very bright conditions, the camera may select a shutter speed faster than your camera's maximum (usually 1/4000 or 1/8000), and in low light, it may select a shutter speed too slow for handheld shooting, requiring a tripod or higher ISO.
Shutter priority mode (S or Tv) lets you set the shutter speed and ISO while the camera automatically selects the aperture. This mode is essential for sports, wildlife, action, and any photography where controlling motion is the priority. Set a fast shutter speed like 1/500 or 1/1000 to freeze fast-moving subjects such as athletes, birds in flight, or running children. Set a slow shutter speed like 1/15 or 1/2 second to create intentional motion blur for creative effects like panning shots of race cars or silky waterfall images. Shutter priority is also useful for handheld shooting in low light when you need to ensure your shutter speed is fast enough to avoid camera shake. The camera will adjust the aperture to maintain proper exposure, but in low light it may select a very wide aperture that reduces depth of field more than you want, or it may indicate that the scene is too dark for the selected shutter speed.
Manual mode (M) gives you complete control over both aperture and shutter speed independently, with the camera providing exposure guidance through the exposure meter in the viewfinder. Manual mode is essential when you need consistent exposure across a series of shots (like a wedding ceremony or studio session), when using flash or studio lighting where the camera's meter cannot accurately measure the flash output, when shooting long exposures where the camera's metering system may not work correctly, and when you want complete creative control over both depth of field and motion. Manual mode can be intimidating for beginners, but it is the most powerful shooting mode and the one that gives you full creative freedom. Start by using it in situations where the light is consistent and you have time to adjust settings between shots, and gradually build your confidence to use it in more dynamic situations.
A shooting modes comparison guide showing the same scene photographed in four different modes with visible differences. The scene is a cyclist racing down a tree-lined street during golden hour. Image 1 "Auto Mode" shows a correctly exposed but unremarkable image — the cyclist is reasonably sharp, the background is moderately blurred, but the exposure is average and there is no creative intent visible. Image 2 "Aperture Priority (f/2.8)" shows the cyclist sharp against a beautifully blurred background of trees and street — the shallow depth of field isolates the subject and creates a professional, artistic look. A note shows the settings: f/2.8, 1/1000s, ISO 200. Image 3 "Shutter Priority (1/15s)" shows the cyclist intentionally blurred with motion trails while the background remains sharp — the slow shutter speed captures the speed and energy of the movement in a creative, artistic way. A note shows the settings: f/22, 1/15s, ISO 100. Image 4 "Manual Mode" shows a dramatic, perfectly exposed image with intentional settings for both aperture (f/4 for subject isolation) and shutter speed (1/500s to freeze motion), with a slight underexposure that creates a moody, editorial feel. A note shows the settings: f/4, 1/500s, ISO 200, -0.7 EV compensation. Below each image, a short explanation describes why the photographer chose that mode and what creative effect was achieved. A callout provides the learning path: "Start in aperture priority to master depth of field. Switch to shutter priority to understand motion. Graduate to manual mode for full creative control. Each mode is a tool — the best photographers know which tool to use for each situation and can switch between modes fluidly as the creative demands of the scene require."
📊 Understanding Camera Sensors and Image Quality
The camera sensor is the heart of your digital camera — it is the electronic component that converts light into digital data to create your images. Understanding sensor technology, how it affects image quality, and the terminology used to describe sensor performance will help you make informed decisions about camera equipment and understand the technical capabilities and limitations of your gear.
Sensor size is one of the most significant factors affecting image quality. Larger sensors have larger individual pixels (photosites) that capture more light, resulting in better low-light performance, wider dynamic range, and shallower depth of field potential. The most common sensor sizes from largest to smallest are: medium format (larger than full-frame), full-frame (36mm x 24mm), APS-C (about 22mm x 15mm), Micro Four Thirds (17mm x 13mm), and 1-inch sensors found in premium compact cameras and some smartphones. Each step down in sensor size represents approximately one stop less light-gathering capability. A full-frame camera at ISO 3200 produces image quality similar to an APS-C camera at ISO 1600 and a Micro Four Thirds camera at ISO 800. This is why full-frame cameras excel in low-light conditions and are preferred by professional wedding, event, and interior photographers who frequently shoot in challenging light.
Megapixels refer to the resolution of the sensor — one megapixel equals one million pixels. A 24-megapixel sensor produces images that are approximately 6000 x 4000 pixels. More megapixels allow for larger prints and more aggressive cropping, but they are not the most important factor in image quality. In fact, for a given sensor size, more megapixels means smaller individual pixels, which can lead to more noise and less dynamic range. The sweet spot for most photographers is 20-30 megapixels, which provides plenty of resolution for large prints and cropping while maintaining excellent image quality. Professional photographers rarely need more than 45 megapixels unless they are doing commercial work requiring massive prints or extensive cropping. Smartphone manufacturers often promote high megapixel counts (108MP, 200MP), but these sensors are tiny and typically use pixel-binning (combining multiple pixels into one) to produce better results at lower effective resolutions.
Dynamic range measures the sensor's ability to capture detail in both the brightest highlights and the darkest shadows of a scene simultaneously. It is measured in stops or EVs (exposure values). A sensor with 14 stops of dynamic range can capture a wider brightness range than one with 10 stops, preserving detail in both bright skies and dark foregrounds. Dynamic range is one of the most important image quality metrics after resolution, and it varies significantly between sensor sizes and generations. Modern full-frame sensors typically offer 13-15 stops of dynamic range, while crop sensors offer 11-13 stops. Higher dynamic range gives you more flexibility in post-processing to recover highlight and shadow detail without introducing noise or artifacts. This is one of the main reasons landscape and real estate photographers invest in full-frame cameras — the ability to capture the full tonal range of high-contrast scenes.
Bit depth determines how many colors each pixel can represent. An 8-bit image (standard JPEG) can represent 16.7 million colors, while a 14-bit RAW file can represent over 4 trillion colors. Higher bit depth allows smoother gradations between colors, especially in sky gradients and shadow areas, and provides more headroom for editing without introducing banding or posterization. This is one of the key advantages of shooting in RAW — the higher bit depth preserves smooth tonal transitions during editing. When you edit an 8-bit JPEG aggressively, you will quickly see banding in smooth areas like skies. A 14-bit RAW file can be pushed much further before quality degrades. Bit depth is particularly important when you make large prints, as banding that is invisible on screen becomes obvious on a large print. Always shoot in the highest bit depth your camera offers (usually 14-bit RAW) for maximum editing flexibility and image quality.
A sensor and image quality comparison guide. The main image is a visual comparison of four different sensor sizes shown at actual size or to scale. The largest is "Medium Format" (53mm x 40mm) shown next to a fingertip for scale — labels note it is used in high-end commercial and fashion cameras like the Fujifilm GFX and Hasselblad systems. Next is "Full-Frame" (36mm x 24mm) — the most common professional format, used in cameras like the Sony A7 series, Canon EOS R series, and Nikon Z series. Next is "APS-C" (22mm x 15mm) — popular in enthusiast and entry-level cameras from Fujifilm, Sony, Canon, and Nikon. Smallest is "Micro Four Thirds" (17mm x 13mm) — used in Olympus and Panasonic cameras, offering smaller, lighter systems. Beside each sensor illustration, a sample image shows a low-light scene photographed with that sensor size — the full-frame image shows clean shadows and smooth noise, while the smaller sensors show progressively more noise and less detail. A second section shows a dynamic range comparison — a high-contrast scene with a bright window and dark interior. The full-frame image preserves detail in both the window highlights and the shadow areas, while the crop sensor image shows blown-out windows or blocked-up shadows. A callout provides sensor buying advice: "Sensor size is the single most important factor in camera image quality, but it is also the main factor in camera size, weight, and cost. Choose the sensor size that matches your priorities: maximum image quality regardless of size and cost (full-frame or medium format), the best balance of quality and portability (APS-C), or the most compact system with good quality (Micro Four Thirds). The best camera sensor is the one that fits your needs, budget, and willingness to carry it."
❓ Frequently Asked Questions
Common questions about photography terms and terminology
What is the most important photography term for beginners to learn?
The exposure triangle — aperture, shutter speed, and ISO — is the most important concept for beginners to master. These three settings control how light enters your camera and determine the brightness, sharpness, and quality of your images. Understanding how they work together is the foundation of moving from automatic to manual mode and gaining full creative control over your photography.
What does aperture priority mode mean?
Aperture priority (Av or A on your camera dial) is a semi-automatic mode where you set the aperture and ISO, and the camera automatically selects the appropriate shutter speed for proper exposure. This mode gives you creative control over depth of field while the camera handles the exposure math. It is the most popular shooting mode for portrait and landscape photographers.
What is the difference between optical zoom and digital zoom?
Optical zoom uses the lens to physically magnify the image before it reaches the sensor, preserving full image quality. Digital zoom crops and enlarges the remaining pixels, reducing quality. Always prioritize optical zoom capability — a 3x optical zoom lens is far more valuable than a 10x digital zoom feature. For interchangeable lens cameras, optical zoom is achieved through zoom lenses.
What does "stop" mean in photography?
A "stop" represents a doubling or halving of light. Increasing exposure by one stop doubles the light; decreasing by one stop halves it. Each full stop on the aperture scale (f/2.8 to f/4 to f/5.6) halves the light. Each full stop in shutter speed (1/125 to 1/250) halves the light. Each full stop in ISO (200 to 400) doubles sensitivity. Understanding stops lets you make precise exposure adjustments across the exposure triangle.
How many photography terms do I need to know as a beginner?
Start with 20-30 essential terms covered in this glossary — aperture, shutter speed, ISO, exposure triangle, depth of field, focal length, white balance, histogram, RAW, JPEG, bokeh, rule of thirds, and leading lines. As you practice and explore different types of photography, you will naturally learn additional terms. The best way to learn is hands-on — shoot, encounter terms, look them up, and apply them.
🏁 Conclusion
Learning photography terminology is like learning a new language — at first it feels overwhelming, but with practice and patience, it becomes second nature. Every term in this glossary represents a tool or concept that will help you take better photographs and communicate more effectively with other photographers. The goal is not to memorize every term overnight but to build your vocabulary gradually as you explore and practice photography.
We have covered over 100 essential photography terms in this guide, organized into categories: the exposure triangle, lens and focus terminology, lighting and color terms, composition and framing, post-processing and file formats, camera types and equipment, advanced techniques, and accessories. Each term is connected to others — understanding one concept helps you understand the next.
The best way to learn is to get out and shoot. Review a few terms from this glossary and purposely practice them. Spend a day in aperture priority mode mastering depth of field. Dedicate another day to understanding shutter speed by photographing moving water or traffic. Each hands-on experience will cement these terms in your understanding far more effectively than reading alone.
Keep this glossary bookmarked and return to it whenever you encounter a term you do not recognize. Share it with fellow photographers who are also learning. And most importantly, enjoy the journey — photography is a lifelong pursuit of learning, creating, and seeing the world in new and beautiful ways. Every expert photographer was once a beginner learning what aperture means. Your journey starts here.
Was this article helpful?
Pro Pixel Agency
Want this done for you? Try our image editing free.
Send a sample, get the finished result back, and only then decide. Clear prices, no commitment.