A comprehensive guide for beginners to master video recording with Open Broadcaster Software
1. Introduction
In today's digital landscape, video content has become the cornerstone of online communication, education, and entertainment. Whether you're a budding YouTuber, an educator creating online courses, or a gamer wanting to share epic moments, having the right recording software is crucial.
OBS Studio (Open Broadcaster Software) has emerged as the gold standard for video recording and live streaming, trusted by millions of content creators worldwide. This free, open-source software offers professional-grade features that rival expensive commercial alternatives.
💡 Why This Guide Matters
Quality video and audio recording isn't just about having good equipment—it's about knowing how to configure and use your software effectively. Poor recording quality can turn viewers away within seconds, while professional-looking content keeps audiences engaged and coming back for more.
2. What is OBS?
OBS Studio is a free, open-source software suite for recording and live streaming. Originally developed for live streaming, it has evolved into a comprehensive recording solution that offers:
🎥 Core Features
- High-performance real-time video/audio capturing
- Scene composition with multiple sources
- Audio mixer with per-source filters
- Powerful configuration options
- Modular 'Dock' UI for custom layouts
🆚 vs. Other Software
- Free vs. paid alternatives like Camtasia
- Open source with active community
- Cross-platform (Windows, macOS, Linux)
- Professional features without cost barriers
- Regular updates and improvements
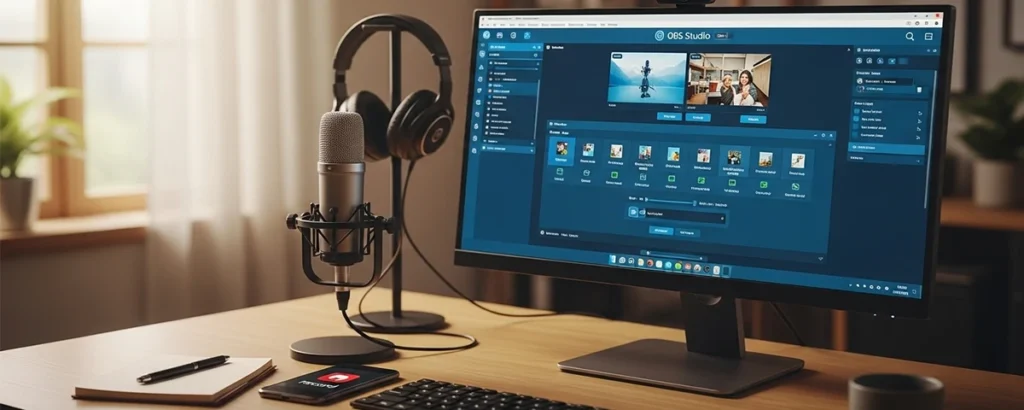
📊 OBS Interface Overview
│ File Edit View Profile Scene Collection Tools │
├─────────────────────────────────────────────────────┤
│ Scenes │ Preview Window │
│ • Scene 1 │ │
│ • Scene 2 │ [Video Preview] │
│ │ │
├───────────────┼───────────────────────────────────┤
│ Sources │ Audio Mixer │ Controls │
│ • Display │ 🎤 Mic │ [Start Recording]│
│ • Camera │ 🔊 Desktop │ [Settings] │
└─────────────────────────────────────────────────────┘
3. Setting Up OBS
Installation Guide
🪟 Windows Installation
- Visit
obsproject.com - Click "Download OBS Studio" and select Windows
- Run the downloaded installer (.exe file)
- Follow the installation wizard (accept defaults)
- Launch OBS Studio from Start Menu
🍎 macOS Installation
- Download the macOS version from obsproject.com
- Open the downloaded .dmg file
- Drag OBS Studio to Applications folder
- Launch from Applications (may need to allow in Security settings)
🐧 Linux Installation
sudo apt update
sudo apt install obs-studio
# Fedora
sudo dnf install obs-studio
# Arch Linux
sudo pacman -S obs-studio
💡 First Launch Tips
When you first open OBS, you'll see the Auto-Configuration Wizard. This is helpful for beginners, but we'll cover manual configuration for better understanding and control over your settings.
4. Configuring OBS Settings
Proper configuration is crucial for optimal recording quality. Let's dive into the essential settings you need to configure.
🎬 Video Settings
Navigate to File → Settings → Video
Base Resolution
- 1920x1080 - Full HD (recommended)
- 2560x1440 - 1440p (high quality)
- 3840x2160 - 4K (if your system can handle it
FPS (Frames Per Second)
- 30 FPS - Standard for most content
- 60 FPS - Smooth motion (gaming)
- 24 FPS - Cinematic look
🎵 Audio Settings
Go to File → Settings → Audio
Sample Rate
Set to 44.1 kHz or 48 kHz for professional quality
Audio Devices
- Desktop Audio: Your system's default speakers/headphones
- Mic/Auxiliary Audio: Your microphone
💾 Output Settings
Navigate to File → Settings → Output
Recording Format
Choose MP4 for compatibility or MKV for safety (can recover if OBS crashes)
Encoder Settings
- x264: CPU encoding (better quality, more CPU usage)
- NVENC (NVIDIA): GPU encoding (faster, less CPU usage)
- AMD VCE: AMD GPU encoding
⚠️ Performance Considerations
Higher resolutions and frame rates require more system resources. Start with 1080p at 30fps and adjust based on your computer's performance.
5. Creating a Scene
Scenes in OBS are like different camera setups. Each scene can contain multiple sources (video inputs, images, text, etc.) arranged exactly how you want them to appear in your recording.
🎭 Understanding Scenes vs Sources
Scenes
Think of scenes as different "shots" or "setups" for your recording:
- Intro scene with logo and music
- Main content scene with screen capture
- Outro scene with subscribe button
- Break scene with "Be Right Back" message
Sources
Sources are the individual elements within each scene:
- Display Capture (your entire screen)
- Window Capture (specific application)
- Video Capture Device (webcam)
- Image (logos, backgrounds)
- Text (titles, captions)
➕ Adding Your First Scene
- Create a new scene: Click the "+" button in the Scenes panel
- Name your scene: Give it a descriptive name like "Main Recording"
- Add sources: Click the "+" in the Sources panel
- Choose source type: Select what you want to capture
- Configure the source: Set up the specific settings for that source
📺 Common Source Types
🖥️ Display Capture
Captures your entire screen - perfect for tutorials, presentations, or desktop recording.
Best for: Screen recordings, software tutorials, desktop presentations
🪟 Window Capture
Captures a specific application window - great for focusing on one program.
Best for: Game recording, specific app tutorials, cleaner recordings
📹 Video Capture Device
Captures from webcams, capture cards, or other video devices.
Best for: Face cam, console gaming, external camera input
💡 Pro Tip: Layer Management
Sources are layered from bottom to top in the Sources list. Drag and drop to reorder them. Sources at the top of the list appear in front of sources below them.
6. Setting Up Audio
Good audio quality is often more important than video quality. Viewers will tolerate lower video quality, but poor audio will drive them away quickly. Let's set up your audio properly.
🎤 Audio Sources
Desktop Audio
Captures system sounds:
- Game audio and sound effects
- Music from applications
- Notification sounds
- Video/media playback
Microphone Audio
Captures your voice:
- Commentary and narration
- Live reactions
- Instructions and explanations
- Communication with viewers
🎛️ Audio Mixer Controls
The Audio Mixer panel shows all your audio sources with individual controls:
Volume Slider: Adjust the loudness of each source
Mute Button: Temporarily disable audio from a source
Settings Gear: Access filters and advanced options
🎚️ Audio Levels and Monitoring
Understanding Audio Levels
Green (-20 to -12 dB): Good, safe levels
Yellow (-12 to -6 dB): Getting loud, watch carefully
Red (above -6 dB): Too loud, will cause distortion
🔧 Audio Filters
Noise Suppression
Reduces background noise like fan hum, keyboard clicks, or air conditioning.
Noise Gate
Only allows audio through when it's above a certain volume threshold, cutting out quiet background noise.
Compressor
Evens out volume levels, making quiet parts louder and preventing loud parts from being too loud.
⚠️ Audio Sync Issues
If you notice audio and video getting out of sync during long recordings, try using a different audio sample rate or enable "Use device timestamps" in your audio device properties.
7. Recording Your First Video
Now that everything is set up, let's record your first video! This section will walk you through the entire process from preparation to hitting the record button.
📋 Pre-Recording Checklist
Technical Checks:
- Audio levels are in the green zone
- Video preview looks correct
- Recording folder has enough space
- Close unnecessary programs
- Disable notifications
Content Preparation
- Script or outline ready
- Materials and files prepared
- Good lighting setup
- Quiet environment
- Water nearby for long sessions
🎬 Starting Your Recording
Ready to Record?
Follow these steps to start your first recording
- Final Check: Look at your preview window to ensure everything appears as expected
- Test Audio: Speak into your microphone and watch the audio levels
- Click "Start Recording": The big red button in the Controls panel
- Wait for the indicator: You'll see "REC" appear in the bottom-right corner
- Begin your content: Start speaking or demonstrating
⏹️ Stopping and Managing Recordings
Stopping Your Recording
Click "Stop Recording" in the Controls panel. OBS will finish processing and save your file.
Finding Your Recording
By default, recordings are saved to:
- Windows:
C:Users[Username]Videos - macOS:
~/Movies - Linux:
~/Videos
Recording Statistics
OBS shows recording time, dropped frames, and CPU usage in the status bar. Keep an eye on these during recording.
🎯 Recording Best Practices
✅ Do This
- Record in short segments for easier editing
- Leave a few seconds of silence at the beginning
- Speak clearly and at a consistent pace
- Monitor your audio levels throughout
- Take breaks during long recordings
❌ Avoid This
- Recording for hours without breaks
- Ignoring audio level warnings
- Moving too quickly through content
- Forgetting to check your preview
- Recording with low battery/storage
💡 First Recording Tips
Don't worry about making mistakes in your first recording! It's better to get comfortable with the process first. You can always re-record or edit out mistakes later. Focus on getting familiar with the OBS interface and your recording workflow.
8. Editing Your Recording
While OBS is primarily a recording tool, you'll likely want to edit your recordings before sharing them. Let's explore your options for post-production editing.
✂️ Basic Editing in OBS
OBS has limited built-in editing capabilities, but you can do some basic trimming:
- Go to File → Remux Recordings
- Select your recording file
- Choose output format (usually MP4)
- Click "Remux" to convert without quality loss
Note: This only converts formats and fixes corrupted recordings. For real editing, you'll need dedicated software.
🎬 Recommended Editing Software
DaVinci Resolve
Professional-grade editor with advanced features
- Color correction and grading
- Advanced audio editing
- Motion graphics
- Multi-cam editing
Adobe Premiere Pro
Industry standard with comprehensive features
- Professional workflows
- Advanced effects and transitions
- Integration with other Adobe apps
- Regular updates
OpenShot
Simple, user-friendly editor for beginners
- Drag-and-drop interface
- Basic transitions and effects
- Title templates
- Cross-platform
Camtasia
Perfect for screen recordings and tutorials
- Built-in screen recording
- Easy callouts and annotations
- Cursor effects
- Simple learning curve
🔧 Common Editing Tasks
Essential Editing Techniques
✂️ Cutting and Trimming
- Remove dead air and long pauses
- Cut out mistakes and "ums"
- Trim beginning and end
- Split long videos into chapters
🎨 Visual Improvements
- Color correction
- Add titles and lower thirds
- Insert transitions
- Crop and resize
🎵 Audio Enhancement
- Normalize audio levels
- Remove background noise
- Add background music
- Sync audio and video
📝 Content Organization
- Add intro and outro
- Create chapters/sections
- Insert B-roll footage
- Add captions/subtitles
⚡ Quick Editing Workflow
- Import your OBS recording into your chosen editing software
- Watch through once to identify areas that need editing
- Make rough cuts to remove obvious mistakes and dead time
- Fine-tune audio levels and remove background noise
- Add titles, transitions, and any visual elements
- Color correct if needed for consistency
- Export in appropriate format for your intended platform
💡 Editing Efficiency Tips
Learn keyboard shortcuts for your editing software - they'll save you hours of work. Also, consider recording in shorter segments to make editing easier and reduce the chance of losing everything if something goes wrong.
9. Exporting Your Recording
Getting your recording out of OBS and into a format suitable for sharing or further editing is crucial. Let's explore the export options and best practices.
📁 OBS Recording Formats
MP4 Format
Most common and compatible format
Pros:
- Universal compatibility
- Smaller file sizes
- Ready for immediate upload
- Supported by all platforms
Cons:
- Can be corrupted if OBS crashes
- Harder to recover partial recordings
MKV Format
Safer option for long recordings
Pros:
- Crash-resistant
- Can recover partial recordings
- Better for long sessions
- No data loss if interrupted
Cons:
- Less compatible
- Needs conversion for some platforms
🔄 Converting MKV to MP4
If you recorded in MKV format, you can easily convert to MP4 without quality loss:
Using OBS Remux Feature
- Open OBS Studio
- Go to File → Remux Recordings
- Click "..." next to "OBS Recording" and select your MKV file
- The output will automatically be set to MP4
- Click "Remux" and wait for completion
Note: Remuxing doesn't re-encode the video, so there's no quality loss and it's very fast!
⚙️ Export Settings for Different Platforms
YouTube Optimization
Recommended Settings:
- Format: MP4
- Resolution: 1080p or 1440p
- Frame Rate: 30fps or 60fps
- Bitrate: 8-12 Mbps (1080p)
Audio Settings:
- Codec: AAC
- Sample Rate: 48kHz
- Bitrate: 128-320 kbps
- Channels: Stereo
Twitch Highlights
Video Settings:
- Format: MP4
- Resolution: 1080p max
- Frame Rate: 30fps or 60fps
- Bitrate: 6-8 Mbps
Limitations:
- Max file size: 10GB
- Max length: 4 hours
- Supported: MP4, MOV, AVI
General Purpose
For local storage, editing, or other platforms:
- High Quality: 1080p, 60fps, 15-20 Mbps
- Balanced: 1080p, 30fps, 8-12 Mbps
- Compressed: 720p, 30fps, 4-6 Mbps
📊 File Size Considerations
Estimated File Sizes (per minute)
720p @ 30fps
- Low: ~15MB/min
- Medium: ~25MB/min
- High: ~40MB/min
1080p @ 30fps
- Low: ~30MB/min
- Medium: ~50MB/min
- High: ~80MB/min
1080p @ 60fps
- Low: ~50MB/min
- Medium: ~80MB/min
- High: ~120MB/min
⚠️ Storage Management
Video files can get very large, especially at high quality settings. A 1-hour recording at 1080p/60fps can easily be 4-8GB. Make sure you have adequate storage space and consider your internet upload speeds when choosing quality settings.
10. Troubleshooting Common Issues
Even with proper setup, you might encounter issues while recording with OBS. Here are the most common problems and their solutions.
🎥 Video Issues
❌ Black Screen in Recording
Your recording shows a black screen instead of your content.
Solutions:
- Display Capture: Try "Window Capture" instead
- Game Capture: Run OBS as administrator
- Graphics Settings: Disable hardware acceleration in the target application
- Multiple GPUs: Set OBS to use the same GPU as your game/application
⚠️ Choppy/Laggy Recording
Your recording appears stuttery or drops frames.
Solutions:
- Lower Settings:Reduce resolution or frame rate
- Change Encoder: Try hardware encoding (NVENC/AMD VCE)
- Close Programs: Free up system resources
- Faster Storage: Record to an SSD if possible
ℹ️ Poor Video Quality
Recording looks pixelated or blurry.
Solutions:
- Increase Bitrate:Higher bitrate = better quality
- Check Resolution: Ensure output matches source
- Encoder Settings: Use "High Quality" preset
- Downscale Filter: Use "Lanczos" for better scaling
🎵 Audio Issues
❌ No Audio in Recording
Your recording has no sound at all.
Solutions:
- Check Audio Sources:Ensure they're not muted in OBS
- Audio Settings: Verify correct devices are selected
- Windows Audio: Check system audio isn't muted
- Exclusive Mode: Disable in Windows sound settings
⚠️ Audio Out of Sync
Audio and video don't match up in the recording.
Solutions:
- Audio Delay:Add sync offset in audio source properties
- Sample Rate: Match all audio devices to same rate
- Device Timestamps: Enable in audio device properties
- Buffer Size: Increase audio buffer in settings
🔊 Audio Too Quiet/Loud
Audio levels are not balanced properly.
Solutions:
- Audio Mixer:Adjust volume sliders in OBS
- Gain Filter: Add gain/volume filter to sources
- Compressor: Use compressor filter for consistent levels
- Monitor Levels: Watch audio meters while recording
⚡ Performance Issues
System Performance Optimization
🖥️ CPU Optimization
- Use hardware encoding when available
- Lower CPU usage preset (faster)
- Close unnecessary background programs
- Set OBS to high priority in Task Manager
💾 Storage Optimization
- Record to fastest available drive
- Ensure adequate free space
- Defragment traditional hard drives
- Use separate drive from OS if possible
🎮 GPU Optimization
- Update graphics drivers
- Use NVENC or AMD VCE encoding
- Reduce game graphics settings
- Enable Game Mode in Windows
🔧 General Tips
- Restart OBS between long sessions
- Monitor system temperatures
- Keep OBS updated to latest version
- Test settings before important recordings
🔍 Diagnostic Tools
OBS Built-in Diagnostics
Stats Panel: View → Stats shows real-time performance data
Log Files: Help → Log Files to check for errors
Auto-Configuration: Tools → Auto-Configuration Wizard for optimal settings
Key Stats to Monitor:
- Dropped Frames:Should be 0% or very low
- CPU Usage: Should stay below 80%
- Memory Usage: Monitor for memory leaks
- Disk Space: Ensure adequate free space
💡 Getting Help
If you're still having issues, the OBS community is very helpful. Check the official OBS forums, Discord server, or subreddit. When asking for help, always include your log files and system specifications for faster assistance.
11. Tips for Improving Video Quality
Great recordings aren't just about software settings—your environment, equipment, and preparation play crucial roles in creating professional-looking content.
💡 Lighting Setup
✅ Good Lighting Practices
- Face the light source: Position yourself facing a window or light
- Soft, diffused light: Avoid harsh direct lighting
- Even illumination: Light both sides of your face
- Avoid backlighting: Don't sit with bright light behind you
- Consistent lighting: Use artificial lights for consistency
❌ Lighting Mistakes
- Overhead lighting only: Creates unflattering shadows
- Mixed color temperatures: Warm and cool lights together
- Flickering lights: Fluorescent or old LED bulbs
- Too dim: Camera struggles, creates noise
- Too bright: Overexposed, washed out appearance
💡 Budget Lighting Solutions
Free Options
- Natural window light
- White poster board reflector
- Desk lamp with white paper diffuser
Budget ($20-50)
- LED desk ring light
- Softbox desk lamp
- Adjustable LED panel
Professional ($50+)
- 3-point lighting kit
- Large ring light with stand
- Professional softboxes
📹 Camera and Framing
Camera Positioning
Height and Angle:
- Camera at eye level or slightly above
- Avoid extreme up or down angles
- Maintain consistent height
- Use a tripod or stable mount
Framing Rules:
- Rule of thirds for positioning
- Leave headroom above your head
- Center yourself in the frame
- Keep background simple and clean
Webcam Optimization
Camera Settings: Adjust exposure, focus, and white balance manually if possible
Clean the Lens: Wipe with a microfiber cloth before recording
Stable Mount: Use a tripod or monitor mount to reduce shake
Background: Choose a clean, non-distracting background
🎤 Audio Quality Tips
Microphone Best Practices
Positioning:
- 6-12 inches from your mouth
- Slightly off to the side (not directly in front)
- Consistent distance throughout recording
- Use a boom arm or stand
Environment:
- Record in a quiet room
- Add soft furnishings to reduce echo
- Turn off fans and AC during recording
- Use a pop filter to reduce plosives
Speaking Techniques
Pace and Clarity: Speak slower than normal conversation, enunciate clearly
Energy Level: Maintain enthusiasm, smile while speaking (it shows in your voice)
Consistency: Keep volume and energy consistent throughout
Breathing: Take natural pauses, don't rush through content
🎬 Content and Presentation
Preparation Tips
- Script or Outline: Know what you want to say
- Practice Run: Do a test recording first
- Materials Ready: Have everything you need within reach
- Backup Plan: Know what to do if something goes wrong
- Time Management: Plan for breaks in long sessions
Engagement Techniques
- Hook Opening: Start with something interesting
- Clear Structure: Tell viewers what to expect
- Visual Aids: Use graphics, text, or demonstrations
- Interaction: Ask questions, encourage participation
- Strong Ending: Summarize and provide next steps
⚙️ Technical Quality Settings
Optimal OBS Settings Summary
Beginner Settings
- 1080p @ 30fps
- 6000 kbps bitrate
- Hardware encoding
- MP4 format
Intermediate Settings
- 1080p @ 60fps
- 8000-10000 kbps bitrate
- x264 medium preset
- MKV format (safety)
Advanced Settings
- 1440p @ 60fps
- 12000+ kbps bitrate
- x264 slow preset
- Custom audio filters
💡 Quality vs. Performance Balance
Remember that higher quality settings require more system resources. Start with moderate settings and gradually increase quality as you become more comfortable with OBS and understand your system's capabilities. It's better to have a smooth, consistent recording at lower quality than a choppy recording at high quality.
12. Conclusion
Congratulations! You've now learned the fundamentals of recording with OBS Studio. From basic setup to advanced optimization techniques, you have all the tools needed to create professional-quality recordings.
🎯 Key Takeaways
Technical Mastery
- OBS is a powerful, free recording solution
- Proper configuration is crucial for quality
- Audio quality is as important as video
- Regular testing prevents recording disasters
- Performance optimization ensures smooth recordings
Content Creation
- Preparation leads to better recordings
- Environment setup affects quality significantly
- Consistent practice improves results
- Editing enhances the final product
- Community support accelerates learning
🚀 Your Next Steps
Immediate Actions
- Download and install OBS Studio if you haven't already
- Follow the setup guide to configure your basic settings
- Record a short test video to familiarize yourself with the interface
- Experiment with different scenes and sources
- Test your audio levels and quality
Skill Development
- Practice recording different types of content
- Learn keyboard shortcuts for efficient workflow
- Explore advanced features like filters and transitions
- Join OBS communities for tips and troubleshooting
- Experiment with streaming if that interests you
Long-term Growth
- Develop your unique content style and voice
- Invest in better equipment as your skills improve
- Learn complementary skills like video editing
- Build an audience for your content
- Consider monetization strategies if applicable
🌟 Final Thoughts
Recording with OBS is both an art and a science. While the technical aspects are important, don't forget that great content comes from passion, preparation, and practice. Your first recordings might not be perfect, and that's completely normal!
The most important step is to start. Every professional content creator began with their first recording, learning and improving along the way. OBS gives you professional-grade tools for free—the rest is up to your creativity and dedication.
Remember that the OBS community is incredibly supportive. Don't hesitate to ask questions, share your experiences, and help others who are just starting their journey. The knowledge you've gained from this guide is just the beginning of your content creation adventure.
Ready to Start Recording? 🎬
You now have all the knowledge needed to create amazing recordings with OBS Studio. The only thing left to do is start!
💬 Share Your Experience
We'd love to hear about your OBS recording journey! Share your first recording experience, challenges you've overcome, or tips you've discovered in the comments below.
📺 Stay Updated
Subscribe for more content creation tutorials, OBS tips, and video production techniques. We regularly publish guides to help you improve your recording and streaming skills.


