
Learn professional techniques for trimming, cutting, and organizing your video clips to create stunning edits that captivate your audience.
Table of contents
- Understanding the Concept of Clipping for Edit
- Why Proper Clipping Matters More Than You Think
- Essential Tools for Clipping Video Footage
- The Step-by-Step Clipping Workflow
- Advanced Clipping Techniques for Professional Results
- Clipping for Different Content Types
- Common Clipping Mistakes and How to Avoid Them
- AI-Powered Clipping Tools in 2026
- Keyboard Shortcuts That Speed Up Clipping
- Building an Efficient Clipping Workflow
- The Connection Between Clipping and Storytelling
- Storage and Backup Considerations
- Practical Exercises to Improve Your Clipping Skills
- Conclusion: Mastering the Art of Clip for Edit
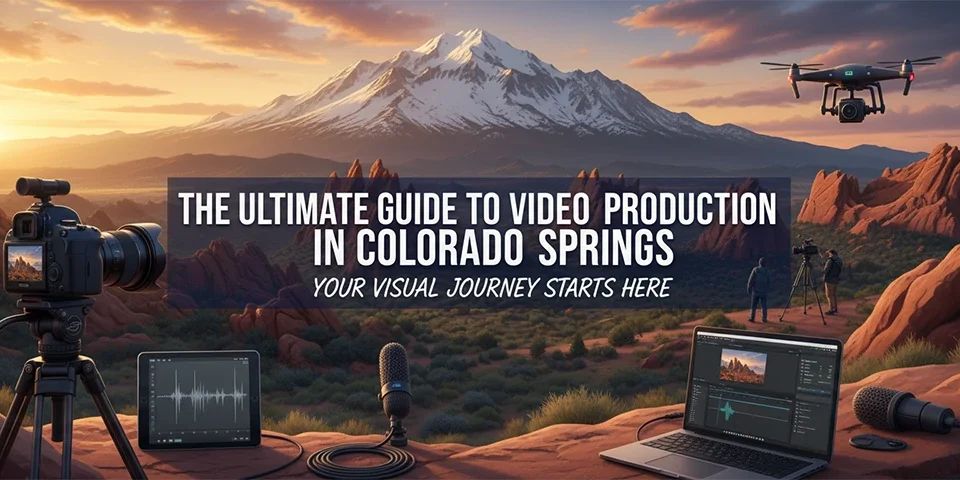
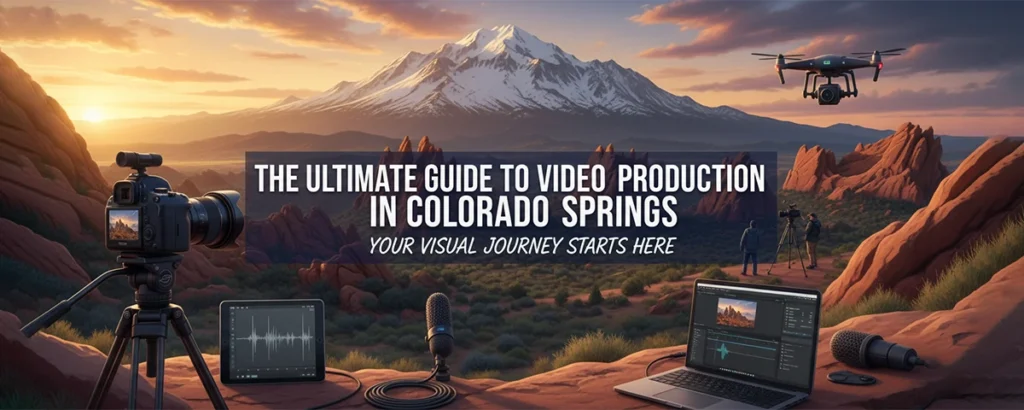
Whether you’re a budding content creator filming your first YouTube video or a seasoned filmmaker working on your next masterpiece, there’s one fundamental skill that separates amateur edits from professional productions: knowing how to clip your footage effectively. The phrase “clip for edit” might sound simple, but it encompasses an entire philosophy of video production that can dramatically transform your final product.
Think about it this way. Every piece of raw footage you capture is like a block of marble. Inside that rough stone exists a beautiful sculpture, but it takes careful clipping, trimming, and shaping to reveal the masterpiece within. This comprehensive guide will walk you through everything you need to know about clipping video footage for editing, from basic techniques to advanced professional workflows that will elevate your content to new heights.

Understanding the Concept of Clipping for Edit
Before we dive into the technical aspects, let’s establish a clear understanding of what “clip for edit” actually means in the world of video production. At its core, clipping for edit refers to the process of selecting, trimming, and preparing individual segments of video footage that will eventually be assembled into a cohesive final product.
When you record video, whether on a smartphone, DSLR camera, or professional cinema rig, you typically capture much more footage than you’ll actually use. A common rule of thumb in professional video production suggests that for every minute of finished content, you might shoot anywhere from five to twenty minutes of raw footage. Some documentary filmmakers work with ratios as high as 100:1, meaning they clip and organize massive amounts of material to craft their stories.
The clipping process involves several key activities. First, you review your raw footage to identify the best takes and moments. Then, you trim away the unusable portions, such as the awkward starts before action is called, the flubbed lines, the camera movements as you’re setting up a shot. Finally, you organize these refined clips in a way that makes the actual editing process smooth and efficient.
🎯 The Three Pillars of Effective Clipping
Reviewing footage and identifying the best takes, moments, and segments that serve your story.
Cutting away unwanted portions, false starts, and dead space to create clean, usable clips.
Arranging clips logically with proper naming conventions, bins, and metadata for efficient editing.
Why Proper Clipping Matters More Than You Think
Many beginning video editors make the mistake of jumping straight into the timeline without properly preparing their clips first. They import everything, throw it on the timeline, and try to figure it out as they go. While this approach might work for very short projects, it quickly becomes unmanageable as your productions grow in complexity.
Professional editors understand that the clipping phase is where much of the creative heavy lifting happens. When you take the time to properly clip your footage before diving into the edit, you’re essentially creating a curated library of your best material. This makes the actual editing process faster, more creative, and significantly less frustrating.
Consider a wedding videographer who shoots eight hours of footage across an entire day of celebrations. Without proper clipping, they’d be scrolling through endless hours of material trying to find that perfect moment when the groom saw the bride for the first time. But with organized, properly clipped footage, they can go directly to their “first look” folder and choose from a selection of pre-trimmed options.
The Impact of Proper Clip Organization
Essential Tools for Clipping Video Footage
The good news is that you don’t need expensive professional software to start clipping your footage effectively. In 2026, we have access to an incredible range of tools at every price point, from completely free options to industry-standard professional suites. Let’s explore the best options available for different needs and budgets.
Professional-Grade Editing Software
For those serious about video editing, professional software offers the most comprehensive clipping and organization tools. Adobe Premiere Pro remains the industry standard for many creators, offering robust media management features, excellent proxy workflow support, and seamless integration with other Creative Cloud applications. Its source monitor allows you to set precise in and out points before bringing clips to your timeline.
DaVinci Resolve has emerged as a formidable competitor, particularly impressive given that its core version is completely free. The media page in DaVinci Resolve provides powerful organizational tools, while the cut page is specifically designed for fast-paced editing with quick clipping in mind. Final Cut Pro continues to be the go-to choice for Mac users, with its magnetic timeline and smart collections making clip organization intuitive.
Beginner-Friendly Options
If you’re just starting your video editing journey, there’s no need to feel overwhelmed by professional software. Several accessible options make clipping and organizing footage straightforward. CapCut has become incredibly popular, especially among social media creators, offering intuitive trimming tools and an easy learning curve. iMovie comes free with Apple devices and provides an excellent introduction to clip-based editing workflows.
Filmora offers a middle ground with its user-friendly interface and reasonable feature set. For quick web-based editing without any software installation, tools like Clipchamp (now integrated into Windows 11) and Kapwing provide browser-accessible clipping capabilities that are perfect for simple projects.

The Step-by-Step Clipping Workflow
Now that we understand the importance of clipping and have our tools ready, let’s walk through a professional workflow that will transform how you approach video editing. This process has been refined by editors working on everything from YouTube content to Hollywood productions.
Step 1: Import and Organize Your Raw Footage
The first step begins before you even start clipping. When you import your footage into your editing software, take the time to organize it properly from the start. Create a logical folder structure within your project that separates different types of content. You might have folders for interviews, B-roll, graphics, music, and sound effects.
Give your clips meaningful names instead of leaving them as the camera-generated file names. “INT_JOHN_TAKE3_GOOD” tells you infinitely more than “C0042.MP4” when you’re deep into an edit and trying to find a specific take. Many professional editors use a naming convention that includes the scene, subject, take number, and a brief quality note.
📁 Recommended Project Folder Structure
Step 2: Review and Mark Your Footage
With your footage organized, it’s time to review everything and identify your best material. This is often called “logging” in professional environments. Watch through your clips and use markers or notes to flag important moments. Most editing software allows you to add markers with keyboard shortcuts, making this process quick and efficient.
During this review phase, you’re not just looking for technically good footage. You’re evaluating emotional moments, authentic reactions, and segments that tell your story effectively. A slightly less sharp image might still be the best choice if it captures a genuine, unrepeatable moment.
Many editors use a rating system during this phase. A simple approach is to use star ratings or color labels: green for “definitely use,” yellow for “maybe,” and red for “only if needed.” This quick categorization saves tremendous time later when you’re assembling your edit.
Step 3: Create Subclips and Selects
Here’s where the actual clipping happens. Once you’ve identified the good portions of your footage, create subclips that isolate just those sections. In Premiere Pro, you can select a range in the source monitor and choose “Make Subclip.” In Final Cut Pro, you’d use the “New Clip” function. DaVinci Resolve has its own method in the media pool.
The key here is to be generous with your in and out points. Give yourself handles, which are extra frames at the beginning and end of each clip. Professional editors typically leave at least one to two seconds of extra footage on either side. These handles become crucial when you need to adjust timing during the edit or add transitions between clips.
Step 4: Organize Selects into Bins
With your subclips created, organize them into bins or collections based on their content or purpose. This is where your earlier folder structure pays off. Move your interview selects into the interview folder, your best B-roll shots into the B-roll folder, and so on.
Some editors take this further by creating scene-specific bins. If you’re editing a tutorial, you might have bins for “Introduction Clips,” “Main Tutorial Steps,” “Tips and Tricks,” and “Closing Remarks.” This scene-based organization mirrors the structure of your final video, making assembly almost intuitive.
Step 5: Create a String-Out or Assembly Edit
Before jumping into detailed editing, many professionals create what’s called a string-out or assembly edit. This involves placing your clipped footage on the timeline in rough chronological or logical order without worrying about precise timing or transitions. The goal is to see your content laid out and get a sense of the overall flow.
This step often reveals issues you wouldn’t notice otherwise. Maybe you’re missing a transition shot between two scenes. Perhaps the interview answer you loved doesn’t fit the narrative as well as you thought. It’s much easier to identify and address these problems in a rough assembly than after you’ve spent hours perfecting individual sections.
Advanced Clipping Techniques for Professional Results
Once you’ve mastered the basics, several advanced techniques can elevate your clipping workflow to professional levels. These methods are used daily by editors working on major productions and can significantly improve both your efficiency and final output quality.
Working with Proxy Files
Modern cameras capture stunning 4K, 6K, or even 8K footage, but editing these massive files can bring even powerful computers to their knees. Proxy workflows solve this problem by creating smaller, lower-resolution versions of your clips for editing. You do all your clipping, organizing, and editing with these lightweight proxies, then switch back to the full-resolution originals for final export.
All major editing software now supports proxy workflows. The key is to create your proxies before you start clipping so that all your organizational work applies to both the proxy and original files. This approach is essential for anyone working with high-resolution footage on a laptop or older computer.
💡 Pro Tip: Proxy Best Practices
- Create proxies at 1/4 or 1/2 resolution of your source footage
- Use a consistent codec like ProRes Proxy or DNxHR LB for smooth playback
- Store proxies on a fast internal or external SSD for best performance
- Always verify the proxy link is working before beginning your edit
- Switch to original media before color grading or exporting final version
Multi-Camera Clipping
If you’re working with footage from multiple cameras, whether for an interview, event, or multi-angle production, specialized multi-camera clipping techniques become essential. Most professional editing software can synchronize clips from different cameras using their audio tracks or timecode, creating a single multi-camera clip that contains all your angles.
When clipping multi-camera footage, you’re essentially choosing which angle to show at any given moment. The multi-camera viewer lets you see all your angles simultaneously and switch between them in real-time during playback. This is exactly how live TV productions work, and you can achieve similar results in post-production.
Using Markers and Metadata Effectively
Professional editors are religious about their use of markers and metadata. Beyond simple “good take” markers, you can create detailed notes that are searchable later. Imagine being able to search your entire project for “laughing” and instantly finding every clip where that happened.
Color-coded markers add another layer of organization. You might use red markers for technical issues, green for your absolute best moments, blue for B-roll opportunities, and yellow for sections that need review. This visual system lets you scan through a timeline and immediately understand the content and quality of your clips.
Clipping for Different Content Types
Different types of video content require different clipping approaches. What works for a YouTube vlog won’t necessarily suit a corporate interview or documentary project. Understanding these distinctions helps you adapt your workflow to maximize efficiency for each project type.
YouTube and Social Media Content
For short-form content creators, speed is often paramount. When clipping for YouTube or social media, focus on energy and pace. Modern audiences have shorter attention spans, so you’ll want to clip tightly, removing any dead air, long pauses, or slow moments. Many successful YouTubers clip so tightly that there’s barely a breath between sentences.
Jump cuts have become an accepted, even expected, stylistic choice in this space. Rather than smooth transitions, the rapid-fire cutting between clipped segments keeps viewers engaged. When clipping for this style, focus on the content of what’s being said rather than maintaining visual continuity.
YouTube/Social
Clip tightly for pace and energy. Remove pauses, embrace jump cuts. Focus on engagement over visual continuity. Keep clips short and punchy.
Interviews
Allow breathing room. Preserve natural speech patterns. Use B-roll to cover cuts. Maintain complete thoughts and emotional moments.
Documentary
Preserve authenticity. Clip for story beats. Leave emotional moments intact. Organize by themes and narrative arcs.
Corporate
Professional pacing. Clean transitions. Message-focused clipping. Remove all stumbles and technical issues. Brand-appropriate organization.
Interview and Documentary Content
Interview editing requires a more nuanced approach to clipping. While you still want to remove obvious mistakes and long pauses, you need to preserve the natural rhythm of human speech. Cutting too tightly can make interviews feel artificial and robotic. Leave room for the subject to breathe, think, and express emotion.
When clipping documentary footage, organization becomes even more critical. You might be working with dozens of hours of material collected over months or years. Creating detailed logs and using smart collections based on themes, subjects, or timeline can mean the difference between a project that gets finished and one that becomes overwhelming.

Common Clipping Mistakes and How to Avoid Them
Even experienced editors sometimes fall into habits that undermine their clipping workflow. Being aware of these common pitfalls helps you develop better practices from the start and avoid frustrating problems down the road.
Cutting Too Close
One of the most common mistakes is trimming clips too tightly during the initial clipping phase. While it feels efficient to cut right up to the first word or action, this leaves you with no flexibility later. When you want to add a transition, adjust the timing, or let a moment breathe, you’ll find there’s nothing left to work with.
Always leave handles. Those extra seconds at the beginning and end of each clip are like an insurance policy. You might not need them, but when you do, you’ll be incredibly grateful they’re there. A good rule of thumb is to leave at least one second on either side for basic projects and two to three seconds for anything that might need elaborate transitions or precise audio work.
Inconsistent Naming Conventions
Starting a project with one naming system and then changing midway is a recipe for confusion. Decide on your naming convention before you begin and stick to it religiously. Whether you prefer “SCENE_SUBJECT_TAKE” or “DATE_LOCATION_SHOT,” consistency is more important than the specific format you choose.
Consider creating a template document that outlines your naming conventions, folder structure, and marker colors. You can reference this for each new project, ensuring consistency across your entire body of work. This becomes especially important if you ever collaborate with other editors or return to old projects months later.
⚠ Common Mistakes to Avoid
- Skipping the review phase — Jumping straight to editing without proper footage review wastes hours later
- Ignoring audio quality — A great visual clip with terrible audio is essentially unusable
- Over-organizing — Creating too many folders and sub-categories can slow you down more than it helps
- Not backing up — All your clipping work is lost if your drive fails without backup
- Deleting original files — Never delete source footage; you may need those “bad” takes later
AI-Powered Clipping Tools in 2026
The landscape of video editing has been dramatically transformed by artificial intelligence, and clipping is one area where these advances are most apparent. In 2026, AI tools can analyze footage and suggest clips automatically, detect key moments, and even identify the best takes based on audio quality, facial expressions, and speech patterns.
Adobe’s Sensei technology now includes powerful auto-clipping features in Premiere Pro. It can identify scene changes, detect speech segments, and even recognize when a subject is speaking versus when they’re listening. DaVinci Resolve’s Smart Bins can automatically categorize footage based on content, while newer tools like Runway and Descript offer AI-powered editing capabilities that were science fiction just a few years ago.
These AI tools don’t replace human judgment, but they dramatically accelerate the initial review and clipping phases. Instead of watching hours of footage in real-time, you can let AI create a rough first pass, then review and refine its suggestions. This hybrid approach combines the speed of automation with the creative discernment that only human editors can provide.
🤖 AI-Powered Clipping Features
Cutting-edge capabilities transforming video editing in 2026
Keyboard Shortcuts That Speed Up Clipping
Mastering keyboard shortcuts is perhaps the single most effective way to speed up your clipping workflow. Professional editors rarely touch their mouse during routine clipping operations. Learning these shortcuts transforms a tedious process into an almost musical flow of rapid decisions and actions.
While every software has different shortcuts, there are some universal operations you should know by heart. Setting in and out points, creating subclips, adding markers, and navigating between clips should all be muscle memory. Invest time in learning your software’s keyboard customization options and create a setup that feels natural to your hands.
Building an Efficient Clipping Workflow
Everything we’ve discussed comes together in your personal workflow. The best clipping workflow is one that matches how you think and work naturally while incorporating professional best practices. There’s no single correct approach, but there are principles that consistently lead to better results.
Start by establishing a routine. Perhaps you always review footage in the morning when you’re fresh, then do the actual clipping and organizing in the afternoon. Maybe you prefer to clip immediately after shooting while the content is fresh in your mind. Whatever approach works for you, consistency helps build efficiency over time.
Create templates and presets that you can reuse across projects. Most editing software allows you to save project templates that include your folder structure, bin organization, and workspace layout. Starting each project from a template saves setup time and ensures you’re following the same organizational principles every time.
The Connection Between Clipping and Storytelling
At its heart, clipping is about making choices that serve your story. Every decision to include or exclude footage, every trim you make, every way you organize your clips shapes the narrative you’ll ultimately create. The best editors understand that clipping isn’t just technical preparation; it’s the first creative phase of the editing process.
When you’re reviewing footage, you’re not just looking for technical quality. You’re searching for the moments that resonate emotionally, the authentic reactions that ring true, the unexpected occurrences that add life to your story. These decisions, made during the clipping phase, define the palette of options you’ll have during the edit.
Think of clipping like a novelist reviewing their notes and research before writing. The novelist isn’t writing the final prose, but they’re making crucial decisions about what information to include and how to organize it. Similarly, your clipping choices set the foundation for everything that follows in your edit.
Storage and Backup Considerations
All your careful clipping work means nothing if you lose it to a drive failure or accidental deletion. Professional editors treat backup as a non-negotiable part of their workflow. The standard recommendation is to maintain at least three copies of your footage and project files: the original working copy, a local backup, and an off-site or cloud backup.
When choosing storage for video work, speed matters. Solid-state drives (SSDs) provide the performance needed for smooth playback and fast renders. Consider keeping your active projects on fast internal or Thunderbolt-connected SSDs while archiving completed work to larger, more economical hard drives.
Cloud backup for video projects presents unique challenges due to file sizes. Services like Backblaze, Dropbox, and Google Drive can handle video projects, but initial uploads of large projects can take days or even weeks. Many editors use a hybrid approach, backing up project files and proxy media to the cloud while keeping full-resolution originals on local redundant storage.
Practical Exercises to Improve Your Clipping Skills
Like any skill, clipping improves with deliberate practice. Here are some exercises that will sharpen your abilities and build the muscle memory needed for efficient editing.
First, practice reviewing footage at faster speeds. Most editing software lets you play back at 2x, 4x, or even faster speeds. Learn to identify good content even at accelerated playback. This dramatically reduces the time spent in the review phase while training your eye to spot quality quickly.
Second, challenge yourself to clip a project using only keyboard shortcuts. Tape over your mouse if you have to. This forced practice accelerates your learning of shortcuts and reveals which ones you need to master for your specific workflow.
Third, try organizing someone else’s footage. When you work with material you didn’t shoot, you’re forced to develop systems that would make sense to any editor, not just yourself. This builds transferable organizational skills that become invaluable on collaborative projects.
🎯 Weekly Practice Challenge
Try this exercise to level up your clipping skills:
- Download a free stock footage pack (check Pexels or Pixabay)
- Set a timer for 30 minutes
- Import, organize, and create subclips for the entire pack
- Use only keyboard shortcuts (no mouse allowed!)
- Review your organization and identify areas for improvement

Conclusion: Mastering the Art of Clip for Edit
The concept of “clip for edit” represents much more than a technical process. It embodies a philosophy of preparation, organization, and creative thinking that separates amateur video work from professional productions. By mastering the skills outlined in this guide, you’re not just learning to trim footage; you’re developing a mindset that will improve every aspect of your video editing.
Remember that efficiency in clipping directly translates to more time for creative editing decisions. When you’re not searching through disorganized footage or struggling with unwieldy files, you can focus on what really matters: crafting compelling stories that connect with your audience.
Whether you’re creating content for social media, producing corporate videos, or working on your first feature film, the principles remain the same. Take the time to properly clip and organize your footage, build workflows that match your creative process, and never stop refining your approach. The investment you make in your clipping skills will pay dividends across every project you ever create.
Ready to Transform Your Video Editing?
Start implementing these clipping techniques today and watch your editing workflow become faster, more organized, and infinitely more creative.


