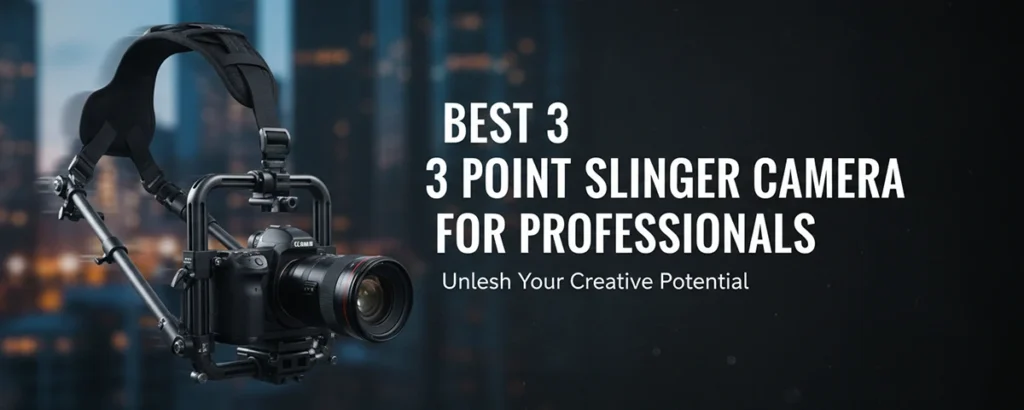
Your Complete Guide to Professional Camera Sling Systems - Perfect for Beginners and Experts
Welcome to the ultimate guide on the best 3 point slinger camera for professionals! Whether you're a seasoned photographer, videographer, or just starting your professional journey, this comprehensive article will help you understand, select, and optimize your camera sling system for maximum performance and comfort.
A 3 point slinger camera system is essential for professionals who need quick access to their equipment while maintaining stability and reducing fatigue during long shooting sessions. This guide covers everything from basic concepts to advanced optimization techniques, making it valuable for both beginners and experienced users looking to upgrade their gear.
Understanding the Best 3 Point Slinger Camera for Professionals
What is a 3 Point Slinger Camera System?
A 3 point slinger camera system is a specialized carrying solution that distributes the weight of professional camera equipment across three key contact points on your body: typically the shoulder, chest, and back or hip. This design provides superior stability, quick access, and reduced strain compared to traditional single-point straps.
Weight Distribution
Evenly spreads camera weight across multiple body points, reducing fatigue and strain during extended use.
Quick Access
Allows rapid deployment and secure storage of your camera without fumbling with traditional straps.
Enhanced Security
Multiple attachment points provide redundant security, protecting expensive professional equipment.
Professional Benefits
The best 3 point slinger camera systems offer numerous advantages for professional use:
- Ergonomic Design: Reduces back and neck strain during long shooting sessions
- Improved Mobility: Allows free movement while keeping camera secure and accessible
- Professional Appearance: Maintains a clean, organized look during client interactions
- Equipment Protection: Minimizes camera swing and potential damage
Common Professional Applications
Professional photographers and videographers use 3 point slinger systems in various scenarios:
- Wedding Photography: Quick transitions between ceremony and reception shots
- Event Coverage: Seamless movement through crowds while maintaining equipment security
- Wildlife Photography: Hands-free hiking with instant camera access
- Street Photography: Discreet carrying with rapid deployment capabilities
- Commercial Shoots: Professional appearance while maintaining equipment readiness
Getting Started with Your 3 Point Slinger Camera System
Selection Requirements
Before choosing the best 3 point slinger camera for your professional needs, consider these essential factors:
- 1. Assess Your Equipment Weight: Calculate the total weight of your camera body, lens, and accessories. Most professional systems support 5-15 pounds comfortably.
- 2. Determine Your Shooting Style: Consider whether you need quick-draw access, hands-free carrying, or maximum security during movement.
- 3. Evaluate Comfort Requirements: Factor in the duration of your typical shoots and any physical limitations or preferences.
- 4. Consider Your Budget: Professional-grade systems range from $50-$300, with higher-end options offering premium materials and features.
- 5. Check Compatibility: Ensure the system works with your specific camera model and mounting points.
Step-by-Step Setup Instructions
Follow these detailed steps to properly set up your 3 point slinger camera system:
- 1. Attach the Primary Anchor: Secure the main attachment point to your camera's tripod mount or dedicated strap lugs. Ensure all connections are tight and secure.
- 2. Adjust the Shoulder Strap: Position the padded shoulder strap for comfort, typically 2-3 inches below your shoulder joint for optimal weight distribution.
- 3. Configure the Chest Stabilizer: Attach and adjust the chest strap to prevent the camera from swinging while maintaining easy access.
- 4. Set the Quick-Release Mechanism: Test the quick-release function multiple times to ensure smooth operation and proper tension.
- 5. Fine-Tune All Adjustments: Make final adjustments while wearing your typical shooting attire to ensure comfort and functionality.
Pro Tip: Always test your setup with a lighter camera or dummy weight first to ensure all connections are secure before trusting it with your expensive professional equipment.
Optimizing Your 3 Point Slinger Camera for Best Results
Professional Optimization Techniques
Maximize the effectiveness of your 3 point slinger camera system with these expert tips and techniques:
🎯 Perfect Positioning
Position your camera at hip level for optimal balance between accessibility and comfort during extended use.
⚖️ Weight Balance
Distribute additional accessories evenly across your body to maintain the system's weight distribution benefits.
🔧 Regular Maintenance
Inspect all connection points weekly and clean fabric components monthly to ensure longevity and reliability.
🎨 Customization
Adjust strap lengths and padding positions based on your specific body type and shooting requirements.
Essential Settings and Accessories
Enhance your 3 point slinger system with these professional recommendations:
- Lens Support: Add a secondary lens support strap for heavy telephoto lenses
- Weather Protection: Use rain covers designed specifically for sling systems
- Quick-Access Pockets: Attach modular pouches for memory cards, batteries, and filters
- Backup Connections: Always use safety tethers as redundant security measures
Best Practices for Professional Use
Industry Best Practices:
- Practice the quick-draw motion until it becomes second nature
- Adjust the system for different clothing layers and weather conditions
- Maintain a consistent setup routine to avoid equipment failures
- Keep spare parts and tools for field adjustments and repairs
- Document your optimal settings for different shooting scenarios
Common Challenges and Professional Solutions
Troubleshooting Guide for Professionals
Even the best 3 point slinger camera systems can present challenges. Here are the most common issues and their professional solutions:
Camera Swing and Instability
Problem: Camera moves excessively during walking or quick movements, affecting shot readiness.
Shoulder and Back Discomfort
Problem: Pain or fatigue develops during extended shooting sessions despite the 3-point design.
Slow Access Times
Problem: Unable to quickly deploy camera for spontaneous shots, missing critical moments.
Equipment Compatibility Issues
Problem: System doesn't work well with specific camera models or lens combinations.
Weather and Environmental Concerns
Problem: System performance degrades in wet, dusty, or extreme temperature conditions.
Take Your Professional Photography to the Next Level
You now have the complete knowledge to select, set up, and optimize the best 3 point slinger camera system for your professional needs. The key takeaways include understanding the three-point weight distribution system, following proper setup procedures, and implementing optimization techniques for maximum performance.
Ready to get started? Begin by assessing your current equipment and shooting style, then research systems that match your specific requirements. Remember that the best system is one that becomes invisible during use, allowing you to focus entirely on capturing perfect shots.
Next Steps for Continued Learning
Continue developing your professional photography skills with these recommended resources:
- Equipment Reviews: Research specific 3 point slinger models and read professional reviews
- Video Tutorials: Watch setup and optimization demonstrations from experienced photographers
- Professional Communities: Join photography forums to share experiences and learn from others
- Hands-On Practice: Test different systems at camera stores or photography events
- Advanced Techniques: Explore specialized applications for your specific photography niche
Remember: The best 3 point slinger camera system is the one that seamlessly integrates with your workflow, enhances your comfort, and never gets in the way of capturing the perfect shot. Invest time in proper setup and practice, and you'll see immediate improvements in your professional photography experience.


