Best Portrait Poses for Stunning Photoshoots
The Complete Guide to Posing Individuals, Couples, Families, and Groups with Professional Tips for Flattering, Natural-Looking Portraits Every Time
 Pro Pixel Agency
The Complete Guide to Posing Individuals, Couples, Families, and Groups with Professional Tips for Flattering, Natural-Looking Portraits Every Time
Portrait Poses
Posing Guide
Photoshoot Tips
Family Portraits
Couples Posing
📖 Introduction: The Art of Portrait Posing
Portrait posing is one of the most important skills a photographer can develop. The way you position your subject directly affects how they look in the final image, how they feel during the shoot, and how the viewer perceives the portrait. Great posing makes subjects look their best, conveys the intended mood and personality, and creates images that people love to share and display. Poor posing even with perfect lighting, composition, and camera settings can result in images that feel awkward, unflattering, or forgettable.
The best portrait poses are not rigid, formulaic positions that every subject must copy. Instead they are guidelines and starting points that can be adapted to each individuals unique body type, personality, and comfort level. A pose that looks stunning on one person may look completely wrong on someone else. The art of portrait posing is about understanding the principles of flattering positioning and then applying them with sensitivity and creativity to each unique subject and situation. This guide covers the essential portrait poses every photographer should know along with the principles and techniques that make posing work effectively.
Understanding how to pose subjects is not just about memorizing specific poses it is about learning to see how the human body moves, how light falls on different body shapes, and how small adjustments in angle, weight distribution, and expression can transform a portrait from ordinary to extraordinary. The most skilled portrait photographers make posing look effortless because they understand the underlying principles so well that they can adapt and improvise in any situation with any subject. By mastering the foundational poses and techniques in this guide you will develop the confidence and creativity to pose any subject in any setting and consistently create stunning, flattering portraits that your clients will treasure.
Posing is also deeply connected to the photographers ability to communicate and connect with their subjects. The best poses in the world will not work if your subject feels uncomfortable, nervous, or unsure about what they are supposed to do. Building rapport, giving clear direction, and creating a positive, encouraging atmosphere on set is just as important as knowing which pose to use. When subjects feel safe, respected, and guided they relax into the pose, their natural personality emerges, and the resulting images have an authenticity that no amount of technical posing skill alone can achieve. This guide covers both the technical and interpersonal aspects of portrait posing because both are essential for creating truly stunning portrait photographs.
A collage of stunning portrait examples showing different posing styles including a classic headshot, a three-quarter length portrait, a full body fashion pose, a couple embracing naturally, a family group, and a creative editorial pose with each portrait labeled with the pose type and key posing tips. Include a before-and-after comparison of the same subject in a poorly posed shot versus a well-posed shot with annotations explaining the specific adjustments made to improve the pose such as chin angle, shoulder position, hand placement, and weight distribution. Show a photographer working with a subject on set demonstrating clear posing direction and positive communication with the resulting image visible on the camera screen showing a natural, relaxed pose. Include a diagram illustrating the key principles of flattering portrait posing with visual guidelines showing how small adjustments in body angles, head position, and weight distribution affect the overall look of a portrait.
🎯 Understanding Portrait Posing Basics
Before diving into specific poses it is essential to understand the foundational principles that make any pose work. These basics apply to every type of portrait from casual headshots to elaborate fashion editorials and mastering them will give you the tools to evaluate and adjust any pose in real time during a shoot.
The rule of angles is the single most important principle in portrait posing. Having your subject face the camera directly square on is almost never the most flattering position because it makes the body appear wider and can look confrontational or stiff. Instead, position the subject at a slight angle to the camera usually about 45 to 75 degrees. This angled position creates visual interest through the lines of the body, appears more slender and elegant, and looks more natural and relaxed. The shoulders should be angled away from the camera with the front shoulder slightly lower than the back shoulder to create a natural, relaxed line. This basic angled positioning is the foundation upon which all other posing elements are built and it instantly makes almost any subject look better in photographs.
Weight distribution and body positioning dramatically affect how a pose looks. Encourage your subject to shift their weight onto their back foot which creates a more relaxed and natural stance and tends to be more flattering for most body types. The front foot should be slightly forward and pointed toward the camera with a slight bend in the front knee to avoid a stiff, locked-leg look. When seated, your subject should sit on the edge of the chair rather than leaning back into it and should sit at an angle rather than straight on. Leaning slightly forward toward the camera creates engagement and connection while leaning back can appear disengaged or uncomfortable. Small adjustments in how the subject distributes their weight and positions their body relative to the camera make a significant difference in the overall look and feel of the portrait.
Hands and arms are often the most challenging part of portrait posing because they can easily look awkward or unnatural if not positioned thoughtfully. Hands should generally be positioned at an angle rather than flat and facing the camera which tends to make them look larger and more prominent. Having the subject hold something a prop, their own clothing, or even their own opposite arm gives the hands a purpose and creates more natural-looking positions. When hands are not holding anything, having them lightly touch the face, rest in pockets with only the thumb showing, or hang relaxed at the sides with a slight bend in the elbows creates more natural, elegant lines. Avoid having hands directly facing the camera or pressed flat against the body which creates unflattering distortions. Creating space between the arms and the body known as arm separation is also important because it defines the waistline and prevents the arms from looking flattened or wider than they actually are.
Head and face positioning is where the most critical posing decisions are made because the face is the focal point of almost every portrait. The chin position is especially important having the subject push their chin slightly forward and down creates definition in the jawline and neck area and avoids the dreaded double chin effect. Tilting the head slightly toward the higher shoulder creates a more engaging and flattering angle. The eyes should generally be directed slightly off-camera or toward the light source for the most natural, pleasant expression. Having the subject close their eyes and open them on request helps create fresh, natural eye expressions. The three-quarter view where the face is turned about 45 degrees from the camera is the most universally flattering angle because it shows the natural contours of the face while minimizing any asymmetry. Understanding these head and face positioning fundamentals allows you to consistently capture flattering portraits of any subject regardless of their natural features or insecurities about being photographed.
A visual diagram showing the rule of angles with three versions of the same subject facing the camera at 0 degrees square on, 45 degrees, and 75 degrees with annotations explaining why the angled positions are more flattering and how the body lines change with each angle. Include a comparison series showing the same subject with different weight distribution positions weight on back foot relaxed, weight centered neutral, and weight on front foot forward with the differences in body language and flattery noted. Show an illustrated guide to hand and arm positioning with multiple options hands in pockets thumb out, hands clasped gently, one hand touching chin, arms crossed at waist with each option shown as a cropped detail view with annotations explaining when and why to use each hand position. Include a head and face angle comparison with the same subject shown in full-face straight on, three-quarter view, and profile with each image showing different chin positions chin down slightly, chin neutral, and chin lifted with annotations explaining which angles are most flattering for different face shapes and features.
👤 Classic Poses for Individual Portraits
Individual portrait poses are the foundation of portrait photography. Whether you are shooting headshots, full-length portraits, or creative editorial images, having a repertoire of classic individual poses that you can adapt to any subject is essential for consistent professional results. These classic poses have stood the test of time because they reliably produce flattering, natural-looking portraits across a wide range of subjects and settings.
The classic three-quarter pose is the most versatile and widely used individual portrait pose. The subject stands or sits at roughly a 45-degree angle to the camera with their weight on their back foot and their front shoulder dropped slightly lower than the back shoulder. The head is turned back toward the camera creating a three-quarter view of the face. The front hand can rest lightly on the hip or in a pocket while the back hand hangs naturally at the side or rests on a prop. This pose is flattering for almost every body type because the angled body creates elegant lines and the turned head defines the jawline and neck. It works equally well for standing and seated portraits and can be adapted for casual, professional, or formal settings by adjusting the expression, styling, and background.
The seated portrait pose creates a more relaxed, intimate feeling while also giving the subject a clear context for their hands to rest and interact. For a classic seated portrait, position the subject on the edge of a chair or stool at a 45-degree angle to the camera. They should sit up tall with their shoulders back and a slight forward lean toward the camera to create engagement. One arm can rest on the back of the chair or along a leg while the other hand rests naturally in the lap or touches the face. Crossing the legs at the ankles rather than the knees creates a more elegant, refined look for formal portraits. For a more casual seated pose, the subject can sit sideways on the chair with their arm draped over the back creating a relaxed, approachable feeling. Seated poses are particularly effective for portraits where you want to convey thoughtfulness, approachability, or quiet confidence.
The leaning pose creates dynamic energy and visual interest in portraits. The subject can lean against a wall, a tree, a doorway, or any available vertical surface. The key to a successful leaning pose is to have the subject put their weight into the lean rather than just touching the surface. One shoulder should be against the wall with the body at an angle to the camera creating a diagonal line through the composition. The front foot should be crossed in front of the back foot or placed slightly forward with the knee bent. The hands can be in pockets, crossed at the chest, or one hand can be in a pocket while the other hangs naturally. The leaning pose works beautifully for casual, urban, and editorial portraits and creates a relaxed, confident look that is very popular with subjects.
The walking or movement pose adds energy and naturalism to portraits by capturing the subject in motion. While not traditionally considered a static pose, directing the subject to walk toward the camera or across the frame creates images that feel candid and spontaneous. The subject walks naturally with one foot forward and one back, arms swinging gently, and head turned toward the camera. Shoot at a higher frame rate and capture multiple frames to get the perfect combination of foot position, body angle, and expression. The walking pose works best for full-length portraits and is especially effective for fashion, lifestyle, and outdoor portraits where the environment adds context and atmosphere. This pose requires the subject to feel comfortable moving naturally in front of the camera so building rapport and creating a relaxed atmosphere is essential for successful movement-based portraits.
A gallery of the four classic individual portrait poses shown as full images the three-quarter standing pose, the seated portrait, the leaning pose against a wall, and the walking movement shot with each image labeled with the pose name and key posing instructions including foot position, hand placement, head angle, and weight distribution. Include a step-by-step visual guide showing the three-quarter pose being built from the foundation up starting with body angle, then shoulder position, then head turn, then arm and hand placement, and finally expression with each step shown as a separate image and annotations explaining the adjustment made at each stage. Show a comparison of the same subject in a standing three-quarter pose versus a seated pose versus a leaning pose with annotations explaining how the pose affects the mood and feeling of the portrait and which situations each pose works best for. Include a series of movement pose frames showing the subject walking through several steps with the best frame circled and annotations explaining why that particular frame works best the position of the feet, the body angle, the hair movement, and the natural expression.
💑 Poses for Couples and Engagement Portraits
Couples and engagement portraits require a different approach to posing than individual portraits because the relationship between the two subjects becomes the focus of the image. The goal is not just to position two people attractively but to capture the connection, emotion, and chemistry between them. The best couples poses create opportunities for natural interaction and genuine emotion while ensuring both individuals look their best in the frame.
The classic embrace pose is the most essential couples pose. The couple faces each other with the woman typically positioned slightly in front of the man or vice versa depending on height and preference. The person in front turns their body toward the camera while the person behind wraps their arms around their partners waist or shoulders. The person in front can place their hands on their partners arms or chest creating a natural, connected pose. Both faces should be turned toward the camera with chins slightly forward and down. The key to this pose is creating genuine closeness have the couple stand as close together as possible with no gap between their bodies. The embrace pose can be adapted for different levels of formality from casual with the couple laughing and interacting to formal with both facing the camera with warm, sincere expressions.
The walking and holding hands pose creates natural, candid-looking couples images that feel romantic and spontaneous. Direct the couple to walk hand in hand toward the camera or across the frame while looking at each other, laughing, or talking. This pose creates natural movement and interaction that results in genuine, affectionate expressions. The couple can also walk away from the camera with their backs to the lens and then turn back to look over their shoulders creating a beautiful, romantic image. Having the couple stop walking and face each other while still holding hands creates a variation that combines the intimacy of the embrace with the naturalism of the walking pose. The walking pose works best in beautiful outdoor locations with interesting paths, streets, or landscapes that add depth and context to the image.
The forehead touch and intimate close-up pose creates deeply romantic, emotional images that focus entirely on the couples connection. The couple faces each other closely with their foreheads touching and their eyes closed or looking gently at each other. The photographers camera should be positioned to capture both faces in profile or three-quarter view with soft, warm lighting that emphasizes the intimacy of the moment. This pose works best as a close-up or medium shot that fills the frame with the couples faces and minimizes background distractions. The intimate close-up pose requires the couple to feel comfortable with close physical proximity so it works best later in the session after rapport and comfort have been established. The resulting images are often the most emotionally powerful of the entire session and are frequently chosen as the couples favorite images from their shoot.
The piggyback and playful poses add fun, personality, and laughter to couples sessions. The piggyback pose where one partner carries the other on their back creates joyful, energetic images that showcase the couples playful side. The person giving the piggyback should stand tall and stable while the person being carried should hold on securely and lean slightly forward for safety and a better angle. Other playful poses include the dip where one partner dips the other as if dancing, the lift where one partner lifts the other in a hug, and the running toward each other pose that captures the moment of reunion. These playful poses work best when the couple is comfortable and having genuine fun so encourage them to laugh, be silly, and interact naturally. The genuine laughter and joy captured in these playful poses often produces the most beloved images from the entire session.
A gallery of essential couples poses including the classic embrace, the walking hand-in-hand shot, the forehead touch intimate close-up, and a playful piggyback pose with each image labeled with the pose name and step-by-step posing instructions including positioning, hand placement, and expression direction. Include a comparison showing the same couple in a posed versus candid-interaction version of the same pose with the posed version showing a more formal, controlled look and the candid version showing natural laughter and genuine connection with annotations explaining how to transition between the two approaches. Show a visual posing flow for a couples session starting with the classic embrace, moving to walking shots, then intimate close-ups, and finishing with playful poses with each pose shown and annotations explaining the progression and how to build comfort and connection throughout the session. Include a height-difference adjustment guide showing how to position couples with significant height differences including having the shorter partner stand on a step or incline, having the taller partner sit or lean, and creative solutions like the lift or dip pose that work beautifully with height differences with each solution shown as an example image.
👨👩👧👦 Poses for Family and Group Portraits
Family and group portrait posing presents unique challenges because you must position multiple people in a way that creates a cohesive, flattering composition while also capturing the unique personalities and relationships within the group. The best family portraits feel natural, connected, and full of genuine emotion rather than stiff, formal arrangements of people standing in a line.
The layered group pose is the foundation of successful family portraits. Instead of having everyone stand in a straight line which creates a flat, uninteresting composition, arrange the family in layers with some people standing, some sitting, and some kneeling or on the ground. The tallest family members typically parents should be positioned in the back row while shorter family members and children are positioned in front. Creating depth through layers makes the group appear more dynamic and allows everyone's face to be clearly visible. The layered pose can be built around a natural focal point such as a tree, a bench, or a beautiful landscape with the family arranged in a way that feels organic and connected to the environment. Having family members touch each other shoulders on backs, hands on shoulders, arms around each other creates visual connection and warmth throughout the group.
The walking and interacting family pose creates natural, candid-looking family portraits that capture genuine connection and joy. Direct the family to walk together along a path or through an open space holding hands, talking, and interacting naturally. The photographer captures candid moments within this directed movement resulting in images that feel authentic and spontaneous. Parents can hold children's hands, older children can walk alongside parents, and younger children can be carried or held. The key is to keep the family moving and interacting while you capture the genuine moments of connection that occur naturally. This approach works especially well for families with young children who may struggle to stay still for traditional posed portraits. The walking family pose creates images full of movement, joy, and authentic family connection that families absolutely love.
The children-focused family pose puts the youngest family members at the center of the composition and builds the group around them. Parents and older siblings gather around the younger children creating a natural, protective circle that emphasizes the family bond. The children can be sitting on a blanket, held in parents arms, or standing in front with the rest of the family gathered close behind. Having younger children interact with each other or with a parent while the rest of the family watches and interacts creates beautiful, layered images full of genuine emotion. This approach is particularly effective for families with babies or toddlers because it works with the childrens natural behavior rather than trying to force them into a rigid pose. The resulting images capture the authentic chaos, love, and joy of family life in a way that feels real and deeply meaningful.
Posing tips for children in group portraits require special consideration and patience. Children have shorter attention spans and less ability to follow complex posing directions than adults so keep instructions simple, positive, and fun. Use games, jokes, and silly sounds to get natural expressions and genuine smiles. Position children at their eye level rather than shooting down at them from adult height which creates more engaging, connected portraits. For very young children, let them sit, stand, or be held in whatever position they are comfortable and capture the moments when they are happy and engaged rather than trying to force them into a specific pose. Involving children in the posing process by asking them where they want to sit or what they want to do helps them feel invested in the session and more willing to cooperate. The best childrens portraits come from sessions where the photographer creates a fun, relaxed, child-friendly environment and captures the genuine moments of joy and connection that happen naturally.
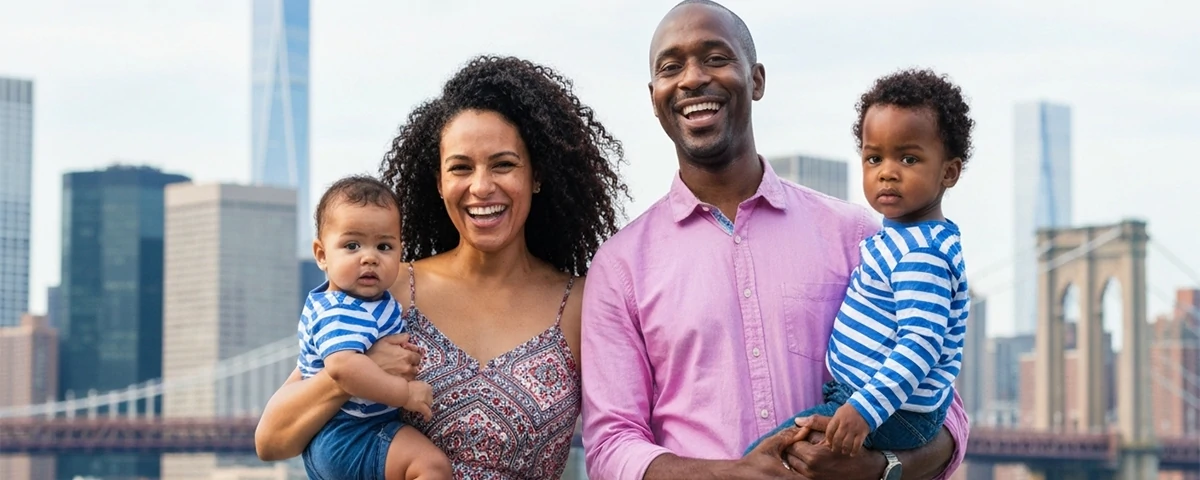
A comparison of a flat line-up family portrait versus a layered family portrait with the same family shown both ways and annotations explaining how the layered composition creates more visual interest, depth, and connection with visible face placement and body positioning differences. Include a step-by-step guide to building a family group pose starting with the back row of standing adults, then adding the seated middle row, then the front row of children or ground level with each step shown as a separate image with arrows and instructions. Show a walking family pose sequence with a family walking hand-in-hand along a path with the photographer capturing candid moments with several frames shown and the best moments circled with annotations explaining what makes each candid moment special. Include a children-focused posing guide with examples of how to position groups around young children including having parents hold babies, siblings gather around toddlers, and the whole family interact naturally around the youngest members with each approach shown as a finished portrait example.
🕴️ Poses for Full Body and Fashion Portraits
Full body and fashion portrait poses require attention to the entire body from head to toe because every element of the subjects appearance and positioning is visible in the frame. These poses are essential for fashion photography, editorial work, and any portrait where the subjects full outfit and body language are part of the visual story being told.
The S-curve pose is the most iconic and flattering full body pose in fashion and portrait photography. The subject stands with their weight shifted onto one leg which causes the hip on the weight-bearing side to push out slightly creating an elegant S-shaped curve through the body. The opposite shoulder drops slightly creating a counter-balance to the hip position. One arm can rest on the hip while the other hangs naturally or touches the face. The S-curve creates beautiful, dynamic lines through the body that are visually interesting and universally flattering. This pose requires practice to look natural but once mastered it becomes a go-to full body pose that works for almost any subject. The key is keeping the pose relaxed and natural rather than exaggerated encouraging the subject to think of it as a natural standing position with a slight adjustment rather than a dramatic, posed stance.
The cross leg stance creates an elegant, refined look that is particularly effective for formal and fashion portraits. The subject stands at a 45-degree angle to the camera with their weight on their back foot. The front foot crosses in front of the back foot with the toe pointing toward the camera creating a graceful line through the legs. The hip on the crossed-over side angles slightly forward adding definition to the waist and hip area. Hands can be placed on the hip, in pockets, or one hand can touch the face or clothing. The cross leg stance elongates the legs, defines the waist, and creates an elegant, refined silhouette that works beautifully for both men and women. It is a staple pose for red carpet, formal event, and fashion editorial photography where elegance and sophistication are the primary goals.
The seated fashion pose offers many variations for creating dynamic full body fashion imagery. The subject can sit on a chair, stool, bench, or the edge of a stage or platform with their body at an angle to the camera. One leg can be crossed over the other at the knee or ankle creating elegant lines through the lower body. The upper body should be upright and engaged with shoulders back and the spine long. Arms can rest on the knees, the chair back, or be positioned to frame the face and upper body. For a more editorial, avant-garde look, the subject can recline backward on their elbows with legs extended creating a powerful, confident pose that commands attention. Seated fashion poses allow for creative exploration of body lines and angles that standing poses cannot achieve and they are essential tools for creating variety in fashion editorial shoots.
A visual guide to the S-curve pose showing the subject in three stages weight equally on both feet straight posture, weight shifted to one foot with hip pushed out, and the full S-curve pose with hip shifted, shoulder dropped, and hand on hip with each stage shown as a full body image with the S-curve line drawn over the body to illustrate the shape. Include a comparison of the crossed leg stance versus a basic standing pose with the same subject in both positions with annotations explaining how the crossed leg version creates more elegant lines through the legs, defines the waist, and creates a more refined overall silhouette. Show a seated fashion pose guide with three variations seated upright on a chair with crossed legs, seated on the edge of a platform with legs extended and body reclined on elbows, and seated sideways on a stool with one leg on the ground and one leg bent with each variation shown as a full fashion portrait with annotations explaining the mood and best use of each seated pose. Include a full body posing checklist infographic showing the key elements to check in every full body portrait including foot position, leg lines, hip angle, waist definition, shoulder position, arm placement, hand position, head angle, and eye direction with each element represented by a visual icon and a brief note about the ideal positioning.
🎨 Posing Tips for Different Body Types and Subjects
Every subject has a unique body type, face shape, and comfort level with being photographed. The best portrait photographers understand how to adapt their posing approach to suit each individual subject making small adjustments that flatter different body types and help every subject feel confident and beautiful in front of the camera.
Posing for different face shapes requires understanding how head angle, chin position, and camera height affect the appearance of the face. For round faces, a three-quarter view with the chin slightly down creates definition and elongates the face. For long or oval faces, a more direct-facing angle with the chin slightly up can create a more balanced appearance. For square or angular faces, softer angles with the head tilted slightly and softer lighting create a more gentle, approachable look. For heart-shaped faces with a wider forehead and narrower chin, slightly lower camera angles and having the chin come forward help balance the features. Understanding face shapes allows you to make small adjustments in positioning that make a significant difference in how flattering the portrait is for the individual subject.
Posing for curvy and plus-size subjects focuses on creating elegant lines that celebrate the subjects natural shape while using angles and positioning to create the most flattering silhouette. Angled body positions are particularly important for curvy subjects because they define the waist and create visual interest through the body lines. Creating space between the arms and the body arm separation is essential for defining the waist and preventing the arms from appearing wider. Having the subject place their weight on their back foot and angle their front foot toward the camera creates beautiful leg lines. The S-curve pose is naturally flattering for curvy bodies because it emphasizes the waist-to-hip ratio and creates elegant curves. Encouraging subjects to stand tall with shoulders back and down creates confidence and poise that is always attractive regardless of body size or shape.
Posing for men typically emphasizes strength, confidence, and relaxed masculinity. Men generally look best in poses that are simple, direct, and avoid overly fussy or complicated hand and arm positions. The classic hands-in-pockets pose with thumbs out creates a relaxed, confident look. Arms crossed at the chest can work for a strong, authoritative portrait but should be done with fingers visible and elbows slightly away from the body rather than a tight, closed-off cross. Having men lean against a wall or other surface creates a relaxed, approachable look. The seated pose with legs spread slightly and arms resting on the knees creates a confident, grounded appearance. For men, expressions tend to work best when they are natural and subtle a slight smile or a direct, confident gaze often works better than a wide, toothy smile for creating masculine portraits that feel genuine and powerful.
Posing for women typically emphasizes elegance, grace, and natural beauty while celebrating the subjects individual features and personality. The three-quarter pose with the body angled and the head turned toward the camera is the foundation of most flattering women's portraits. Hand placement is especially important for women's poses hands should look elegant and relaxed whether touching the face, resting on the hip, or holding a prop. The S-curve and crossed-leg stances create elegant, feminine lines through the body. Shoulder positioning with the front shoulder dropped lower than the back creates a graceful, elegant line through the upper body. Hair placement can be used as a styling element having hair swept to one side or gently touched by the subject adds elegance and visual interest. The most important factor in women's portrait posing is making the subject feel beautiful and confident throughout the session because confidence and comfort always translate into better portraits regardless of the specific pose being used.
A face shape posing guide with four common face shapes round, oval, square, and heart shown with recommended and avoided head angles and chin positions for each shape with each face shape example shown as a cropped portrait with annotations explaining the posing adjustments that work best. Include a plus-size posing guide with the same curvy subject shown in a less flattering pose square on, no arm separation versus a more flattering pose angled body, arm separation, S-curve with annotations explaining the specific adjustments that create a more flattering silhouette. Show a men's posing guide comparing common men's poses hands-in-pockets, arms crossed, leaning, and seated with each pose shown as a full portrait and annotations explaining the best use and mood of each pose for male subjects. Include a women's posing guide with a range of poses from classic three-quarter to hand-on-hip to seated elegance with each pose shown and annotations explaining the key elements that make each pose work for female subjects. Include a diverse body type gallery showing the same essential portrait pose adapted for different body types and sizes demonstrating that good posing principles work universally when adapted thoughtfully to each unique individual with annotations explaining the adjustments made for each body type.
📸 Posing for Candid and Lifestyle Portraits
Candid and lifestyle portrait posing focuses on creating images that feel natural, unposed, and authentic while still being carefully guided and directed by the photographer. The art of candid posing is paradoxical you are deliberately creating the conditions for natural-looking moments to occur. This approach has become increasingly popular in modern portrait photography because clients want images that feel like real life rather than stiff, formal portraits. Mastering candid posing techniques allows you to capture the authentic personality and relationships of your subjects while still maintaining creative control over the final image.
Directed candid posing is the technique of giving subjects simple activities or interactions to perform while you capture the natural moments that emerge. Instead of telling a couple to stand still and smile, you might ask them to walk together while talking about their favorite memory, or to whisper something funny in each others ear, or to spin around and laugh together. These directed activities create genuine interaction and emotion that results in natural-looking candid images. The key is giving subjects something specific to do or talk about rather than just expecting them to act naturally on command. The more specific and engaging the direction, the more natural and authentic the resulting candid moment will be. Directed candid posing works beautifully for couples, families, and individuals who want portraits that feel like real moments from their lives rather than staged photographs.
Environmental interaction posing involves using the subjects surroundings as a natural posing tool that creates authentic, context-rich images. Ask your subject to interact with elements of their environment leaning on a fence, touching leaves on a tree, sitting on a bench and looking around, walking up or down stairs, opening a door, or looking out a window. These environmental interactions give the subject a natural purpose and create images that feel connected to the location and moment. The environmental elements become de facto props that help the subject feel more comfortable and natural while also adding visual interest and context to the composition. This approach is particularly effective for outdoor lifestyle sessions, urban portraits, and environmental portraiture where the setting is an important part of the story being told.
The in-between moment technique captures the genuine expressions that occur naturally between posed shots. After giving a subject a pose or direction, instead of immediately calling cut or moving to the next pose, keep shooting as the subject transitions from the directed pose back to their natural resting expression. These in-between moments often produce the most authentic, relaxed, and beautiful images of the entire session because the subject has dropped their performance and returned to their genuine self. The transition from a laugh back to a neutral expression, the moment of quiet reflection after an activity, the micro-expression that flickers across a subjects face when they think the shoot is over these in-between moments are goldmines of authentic portraiture that require patience, observation, and a finger ready on the shutter button to capture.
A series of candid lifestyle portraits showing subjects engaged in directed activities a couple walking and laughing while holding hands, a family playing together in a park, an individual looking out a window in quiet reflection, and a group of friends gathered around a table talking with each image labeled with the direction given to create the candid moment and annotations explaining the specific techniques used to achieve the natural look. Include a comparison of a posed portrait versus a directed candid portrait of the same subject with the posed version showing a controlled smile and stiff posture while the candid version shows a natural expression and relaxed body language with annotations explaining how the direction and approach differed between the two images. Show an environmental interaction posing guide with examples of subjects interacting with their surroundings leaning on a wall, touching foliage, sitting on steps, and walking through a doorway with each example shown as a finished portrait and annotations explaining how the environmental interaction contributed to the natural feel of the image. Include a visual sequence of in-between moments showing several frames captured between posed directions with the most authentic and beautiful frame circled and annotations explaining why the in-between moment produced a more genuine image than the directed pose.
🪞 Posing with Props and Accessories
Incorporating props and accessories into portrait posing adds dimension, interest, and natural hand placement opportunities that enhance the overall composition while helping subjects feel more comfortable and engaged. Props give subjects something specific to do with their hands, something to focus their attention on, and something that adds context and personality to the portrait. The most effective prop posing integrates the object naturally into the subjects interaction and positioning rather than having the prop feel like an afterthought or a distraction.
Posing with hats and headwear creates opportunities for elegant hand placement and adds a stylish, fashion-forward element to portraits. When a subject is wearing a hat, they can gently touch the brim, adjust the angle, or hold the hat in place in the wind. These natural hat-touching gestures give the hands a clear purpose and create beautiful, natural lines through the arms and upper body. For wide-brimmed hats, having the subject hold the brim on one side while tilting their head creates a glamorous, Old Hollywood-inspired pose. For caps and casual hats, having the subject adjust the brim or hold the hat in their hand creates relaxed, approachable portraits. The key is ensuring the hat complements the face rather than overwhelming it having the subject tilt their head slightly so the hat brim creates an angle rather than a straight line across the face.
Posing with flowers and botanical props adds natural beauty, color, and romantic energy to portraits while giving subjects a beautiful prop to interact with. A single flower held near the face draws attention to the subjects features and creates elegant lines through the arm and hand. A bouquet held at waist level creates a natural hand position and adds color and visual interest to the lower portion of the composition. Having the subjects smell the flower with eyes closed or looking downward creates a romantic, contemplative mood. For botanical settings, having the subject touch or hold leaves, branches, or petals of surrounding plants creates natural environmental interaction that feels organic and unposed. Flowers and botanical props work especially well for engagement, bridal, spring, and romantic portrait sessions where natural beauty and romantic energy are central to the aesthetic.
Posing with chairs, furniture, and structural props gives subjects a supportive element to lean on, sit in, or interact with that creates natural, varied posing opportunities. A chair or stool gives the subject a clear context for sitting posing with clear direction for how to sit sit at the edge, at an angle, with good posture, and with legs positioned elegantly. A wall, pillar, or tree gives the subject something to lean against creating relaxed, confident leaning poses. A table or counter gives the subject a surface to lean on, place their hands on, or interact with creating natural, lifestyle-oriented portraits. The key to posing with structural props is ensuring the subject interacts with the prop naturally rather than just being placed next to it. The prop should be integrated into the pose in a way that feels purposeful and connected to the subjects body position and the overall composition.
A hat posing guide showing the same subject in several hat styles a wide-brim fedora, a casual cap, a beanie, and a fascinator with each pose showing the subject interacting naturally with the headwear touching the brim, adjusting the angle, or holding the hat with annotations explaining the hand placement and head angle adjustments for each hat style. Include a flower prop posing guide showing a subject interacting with flowers in several ways holding a single flower near the face, holding a bouquet at waist level, smelling a flower with eyes closed, and having flowers incorporated into the hair with each pose shown as a finished portrait and annotations explaining how the flower prop enhances the composition and hand placement. Show a furniture and structural prop posing guide with a subject using a chair for seated poses, a wall for leaning poses, and a table for supported standing poses with each scenario shown as a full portrait and annotations explaining the key positioning elements that make each prop-enhanced pose work. Include a prop posing comparison showing the same subject in a standard pose without a prop versus an enhanced pose with a prop showing how the prop gives the hands purpose, adds visual interest, and creates a more natural, engaging portrait with the differences highlighted and the specific improvements from the prop use noted.
❓ Frequently Asked Questions
❓ What is the most flattering angle for portrait photography?
The three-quarter view where the subject's body is at a 45 to 75 degree angle to the camera and their face is turned back toward the lens is the most universally flattering angle for portrait photography. This angle creates elegant body lines, defines the jawline and neck, minimizes the appearance of facial asymmetry, and creates a more natural, relaxed look than having the subject face the camera directly. The exact angle should be adjusted based on the individual subject's features and the specific look you are trying to achieve.
❓ How do I help a nervous subject relax during a portrait session?
Start by building rapport before you even pick up your camera have a genuine conversation, ask about their interests, and find common ground. Give clear, positive direction rather than vague instructions like just be natural. Demonstrate poses yourself to show the subject what you want them to do. Use encouraging language and praise what they are doing well throughout the session. Play music that matches the mood you are creating. Take a few test shots and show the subject the results on your camera screen to build their confidence. Start with simpler, more structured poses and gradually move to more relaxed, creative poses as the subject becomes more comfortable. Remember that your own energy and confidence as the photographer directly affects how the subject feels so stay calm, positive, and professional throughout the session.
❓ How many different poses should I use in a single portrait session?
A typical one-hour portrait session should include approximately 8 to 15 distinct poses depending on the type of shoot and the complexity of each pose. For headshot sessions, you might use 8 to 10 variations focusing on subtle changes in head angle, expression, and lighting. For full portrait sessions, plan for 10 to 15 poses that include a mix of full-length, three-quarter, and close-up compositions. The key is to provide enough variety to give your client choices without rushing through poses so quickly that you do not capture the best version of each one. Quality matters more than quantity it is better to nail 8 great poses than to rush through 20 mediocre ones.
❓ How do I pose groups with mixed heights?
When posing groups with mixed heights, use the layered approach with the tallest people in the back row, medium-height people in the middle, and shorter people in the front. People can also stand, sit, kneel, or be positioned on steps or risers to create visual balance. When there is a significant height difference within a couple, have the taller partner stand slightly behind or to the side and the shorter partner stand closer to the camera or on a slight elevation. Avoid having a very tall person and a very short person standing directly next to each other in the same plane which exaggerates the height difference. With thoughtful positioning and layering, groups of any height composition can be arranged into a balanced, cohesive portrait.
❓ How do I pose subjects wearing glasses?
Subjects wearing glasses require special attention to avoid glare and reflections on the lenses. Position the lighting at a higher angle to minimize lens reflection. Have the subject tilt their chin slightly down which also adjusts the angle of the glasses and reduces glare. Ask the subject to push their glasses slightly up on their nose if they have slipped down. For the most control over glare, use a polarizing filter on your lens. If glare persists, have the subject remove their glasses for a few shots or try shooting from a slightly different angle. Some photographers keep a pair of empty frames with no lenses for subjects who wear glasses full-time so they can be photographed without lenses but still look natural in their glasses.
❓ What is the best way to pose hands in portraits?
Hands are often the most challenging element of portrait posing because they can easily look awkward or distracting. The best approach is to give hands a purpose have the subject hold something like a prop, their clothing, or their own opposite arm. When hands are not holding anything, place them at an angle rather than flat toward the camera, with soft, relaxed fingers rather than stiff, straight fingers. Hands in pockets with only the thumb visible creates a natural, relaxed look. One hand gently touching the chin or face can frame the face and create elegant lines. Creating space between the arms and the body arm separation prevents hands from looking flattened or distorted. Avoid having hands pressed flat against the body or positioned directly facing the camera. Always check the hands in your viewfinder before taking the shot and make small adjustments as needed until the hand position looks natural and elegant.
✨ Conclusion
Mastering portrait posing is a lifelong journey of learning, practice, and refinement. The best portrait photographers never stop studying how the human body moves, how light interacts with different features, and how to bring out the unique beauty and personality of every subject they photograph. The poses and principles in this guide provide a solid foundation for creating flattering, natural-looking portraits across a wide range of subjects and situations but the real mastery comes from applying these principles with sensitivity, creativity, and genuine care for the people you photograph.
Remember that the ultimate goal of portrait posing is not technical perfection it is connection. The most powerful portraits are not necessarily the ones where every finger is positioned perfectly and every angle is mathematically ideal. The most powerful portraits are the ones where the viewer feels a genuine connection with the subject where the personality, emotion, and humanity of the person in the photograph shines through regardless of the specific pose being used. Great posing serves this goal by helping subjects feel comfortable, confident, and beautiful so that their true self can emerge and be captured in the photograph.
As you develop your posing skills, practice regularly with willing subjects study the work of photographers you admire, and most importantly listen to your subjects and pay attention to what makes them feel and look their best. Keep a mental or physical collection of poses that work well for different types of subjects and situations and continue adding to this collection throughout your career. Every subject is different and every session teaches you something new about the art of portrait posing. Embrace this learning process, stay curious and creative, and your portrait photography will continue to evolve and improve with every subject you photograph. The confidence you build in your posing skills will free you to focus on what truly matters capturing the unique beauty and spirit of every person who stands in front of your camera.
Where to go next
Spotted something wrong? Report an error on this page. We correct on the page and say what changed.